Building a 4" Rotary Table
Suitable for the Taig Mill
Part Five.
Details..
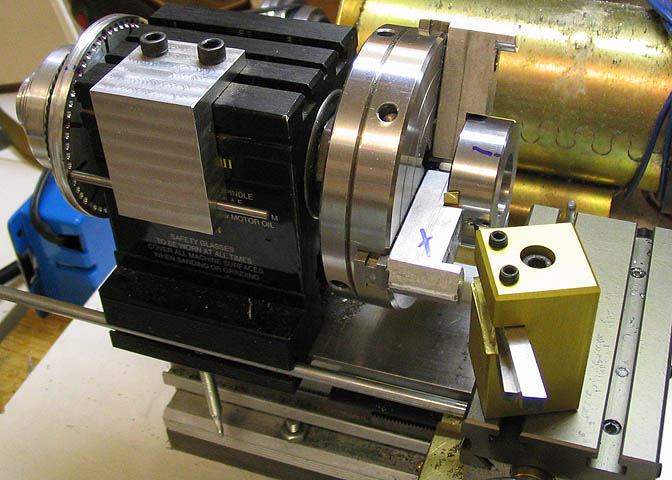
The dial can now be set up for cutting the calibration marks on it's circumference. Since the worm
and gear have a ratio of 60:1, the dial needs 60 graduations on it in order to give the 1/10 degree
resolution that I want. The set-up for this engraving is shown above. The depth stop is set for making
the longest marks, which will be at six points on the dial, representing full degrees. The indexing
disc is set in the first index hole, and the tool is run up to the dial to barely touch it.
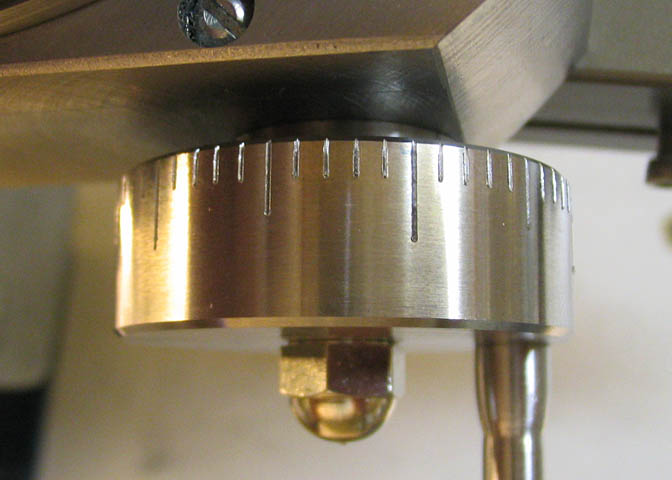
To cut each mark, the cross slide is advanced .002" and the carriage is run up to the depth stop
which will make a light line on the dial. This is repeated until the mark is .010" deep. Then the
index disc is advanced 10 holes, and the process is repeated. Keep this up until there are six
marks on the dial, and the full degree marks are done. Then, the disc is advanced five holes, and
the first of the 1/2 degree marks is made. These are somewhat shorter than the full degree marks,
and the depth stop is reset for this length. The longest marks are about .3" to denote full
degrees. The 1/2 degree marks are about .2" long. For the marks that will denote 1/10 degree,
the carriage stop is reset to about .1" and every hole is used on the indexing disc.

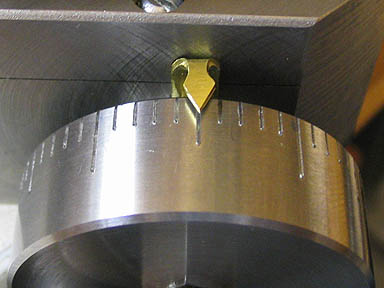
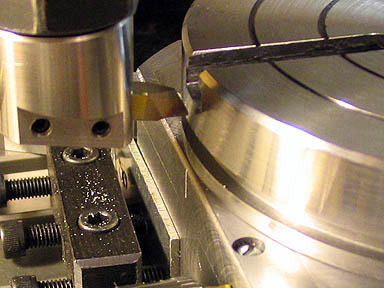
This shot shows a chip being cut to make the marks on the dial. The cutter
is very similar to a threading tool, but turned on it's side.
No numbers yet. A problem for another day.
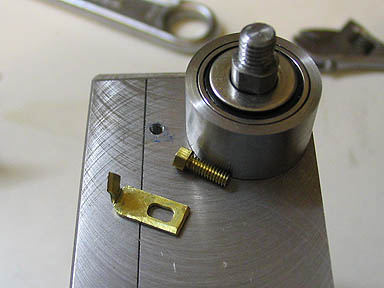
I made a little pointer of brass sheet and mounted it with a 2-56 cap screw.
(The pointer looks crooked in the right pic, but it isn't. It's just the camera angle.)
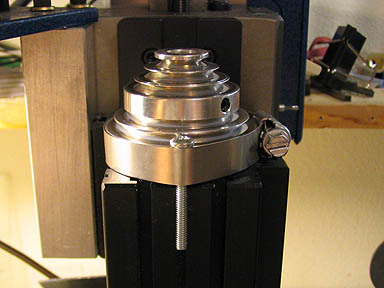
The index marks for the periphery of the table top are made in a similar manner to the marks on the dial, but
the job is done on the mill. The spindle has to be locked tight so the engraving tool won't move, (left picture).
A worm driven hose clamp is used to secure a #10 screw tightly against the drive pulley. The screw shaft sits
in the center dove tail of the head stock.
The table itself is used to do the indexing chores. Marks are engraved every 10 degrees, with longer marks at
every 30 degrees. The longer marks are made from half way between the bottom of the T-slots and the clamping
groove and continue down to the surface of the table top plate. The shorter marks are only on the portion below
the clamping groove. After the first mark is made, the mill X table is backed out a little and the mark is continued
down the side of the table base for .25" to use as the main alignment mark for the table top.
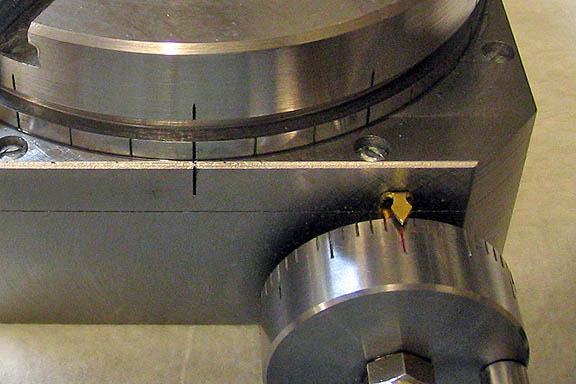
I marked the zero index mark on the dial with red paint. This is a temporary measure
until I get a set of small numeric punch stamps. Then I have to get the courage up to
actually do the stamping. I can see the opportunity for multiple screw-ups while stamping
the numbers, and it's definitely a job for some kind of jig. I'll get to it eventually, but may
use the table as it is for the time being. Something else that may work well are number
transfers. I know they work well from past experience in using them for some clock work.
The plus side to them is mistakes are not eternal, as they can be scraped off if done
before they are dry. They will wear off over time, though.
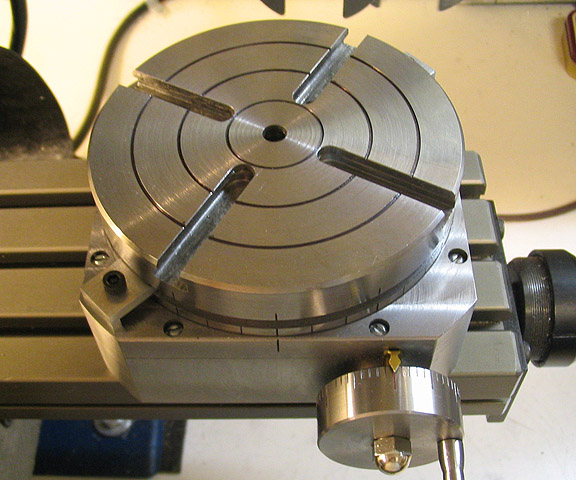
It's finished. Well, except for stamping the numbers on the dial, but I'm not
going to show that here. Heck, I'm afraid to do it.
Part One
Part Two
Part Three
Part Four
Note:
Stephen Campbell followed my progress on this table as it was being built.
I work from a simple sketch, and am not so good using a CAD drawing program,
so Steve very kindly made the drawings going by my measurements. Long story
short, if there should be any errors in the drawings, they are MY fault, not Steve's.
A heartfelt Thank You to Steve for all his good work!
The drawing is in a PDF file, so you need Acrobat to open it, (still free, I understand).
Rotary Table Drawings
More Taig Lathe & Mill Projects
deansphotographica.com
(home page)
Copyright Dean Williams