Building the Tripod Steam Plant
Miniature Steam Engine and Boiler
Part 2
Time to start work on the legs. There will be 18 of these, and they don't seem like much, but they took some time.
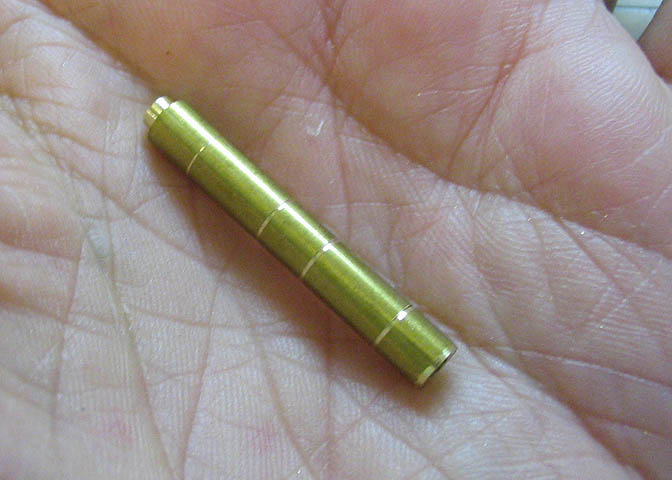
This is a blank for one of the legs. One end is turned down to fit the holes in the bottom of the boiler piece,
and the other end is threaded inside for the screws that will hold it to the base plate.
The lines you see on it are a guide for turning on some decoration. Just a quick measure with a rule,
and a touch with the tool as the piece spins in the lathe, and the line is there.
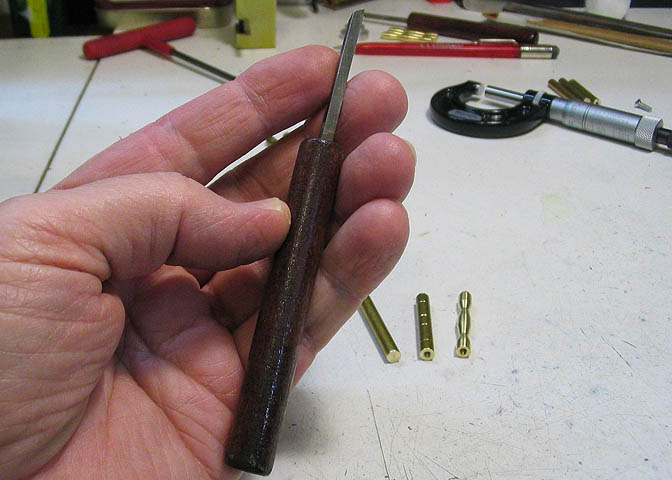
I do small decorative turning with a thing called a graver. I make these up from a small diameter piece of
wood dowel and a 1/8" square HSS tool bit. The tool bit is ground on a bench grinder to put on the basic shape
I need, then stoned on an india stone, and finally honed on an extra hard arkansas stone. I get them very
sharp, and they will cut most any metal. Even hard grade 8 cap screws and music wire.
This is the kind of tool usually used on a watchmaker's lathe. Although in this segment I'm using it for
eyeball decorative turning, a graver can be used for very fine and accurate work, too. Some pivots, (the
shafts that go through watch wheels/gears) for watches are only .003"-.006" in diameter, and they are done
using this hand held tool. Takes a bit of practice..
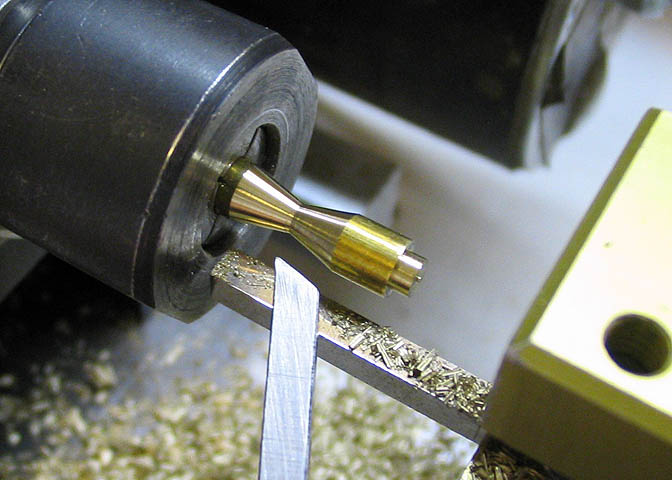
Here you can see a couple of cuts to form a shape. With a graver, this can be done fairly quickly. It
took about one minute to go from round stock to the shape seen in this picture.
The tip of the graver looks rounded in this picture, but that is a trick of the light. It is actually
quite pointy and bloodletting sharp.
One last thing about gravers; They present an obvious hazard if used around a chuck with external jaws.
You are likely to run your fingers into the chuck, and if it should catch the graver you will have
a very sharp thing flying about the room. Take care.
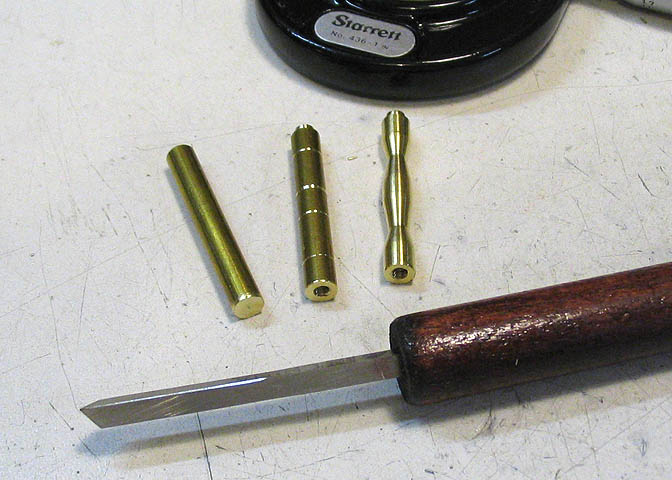
Here, you can see the steps in turning out a leg.
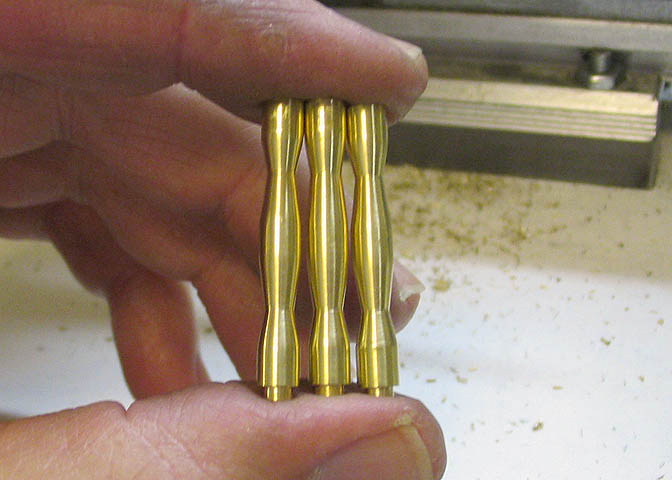
They are all just turned by eye, with the help of the lines I'd put on them to help keep the features in
approximately the same place. None of them are perfectly the same, but they match pretty well.
Next, I'll be doing the needed silver brazing for the boilers. I chose to make these as built-up units
because of the cost and waste involved in making the boilers out of one piece of brass stock. If you go
to a metal seller and ask for some 1 5/16" diameter solid brass rod, you will see why. The copper prices
lately have gone so high that steps need to be taken to economize somewhat. Making the boilers from solid
results in a waste of approximately 50% by the time you carve out the inside and cut the contours on outside.
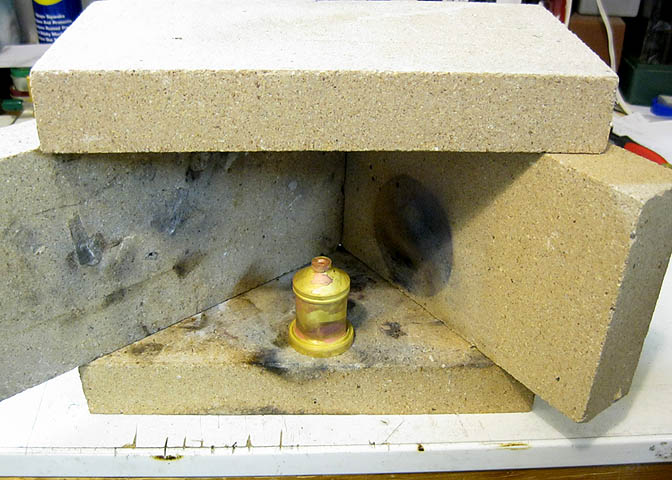
This is what I use as my small brazing hearth. Just a few real firebrick stacked up to provide a crude oven.
The idea is simple. Keep as much heat around the work piece as possible. Actually, for brazing the boiler
shells, I removed the top brick so I could see well down inside the boiler to watch the silver flow the joint.

These are my favorite silver brazes. They are the same kind of alloys that people call "silver solder" and
"hard solder". There is nothing "solder" about them. They are brazing alloys, simple as that. You can read
the tags to see what they are. This picture also gives an idea of the length of various diameters of the silver
wires. The one on the left is BAG-7, 56% silver in 1/16" diameter. The one next to it in a similar sized
diameter of coil is BAG-5, 45% silver in .031" diameter wire. Both of those coils are one ounce.
The third smaller coil in front is another BAG-7, 56% silver in .025" diameter wire. That is about 1/2 ounce.
The smaller diameter you get your wire, the longer the piece will be. I find the smaller wire sizes to be more
economical, as you don't waste as much.
You can buy silver brazing wire under a lot of brand names. Those names mean nothing. Buy your wire by the
simple specification number of BAg-5, BAg-7, etc. and you will always know what you are getting. That number is
a standard spec number in the States. Great Britain has a similar spec numbering system. I don't know it.
If you want to see British specs go to the Johnson Matthey website.
The three most common ones in the States are BAg-5, (45% silver), BAg-7, (56% silver) and BAg-1, (45% silver, and
contains cadmium). I use cadmium free because I like to do my silver brazing inside the shop.
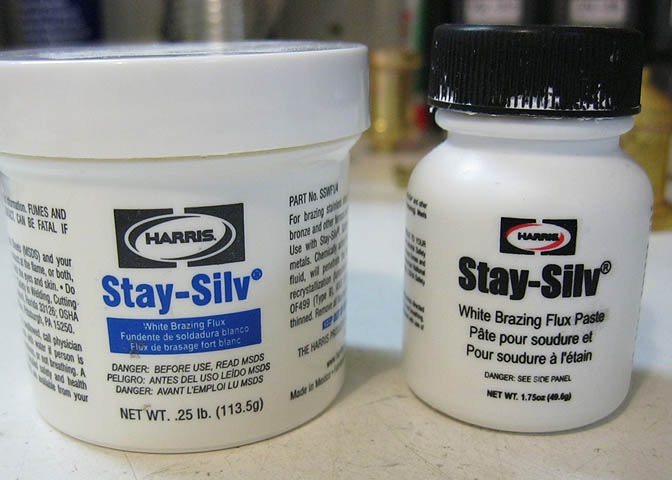
Next thing you need is flux. I usually use this kind, (they are both the same, in different dispensers).
Notice the bottles say "White BRAZING Flux Paste", NOT soldering flux. I use the Harris brand shown, but
have also used SRA brand "White Brazing Fluz #601". It is the same stuff as the Harris flux. Will work
the same. The brand you buy doesn't matter, as long as it is brazing flux, not soldering flux.
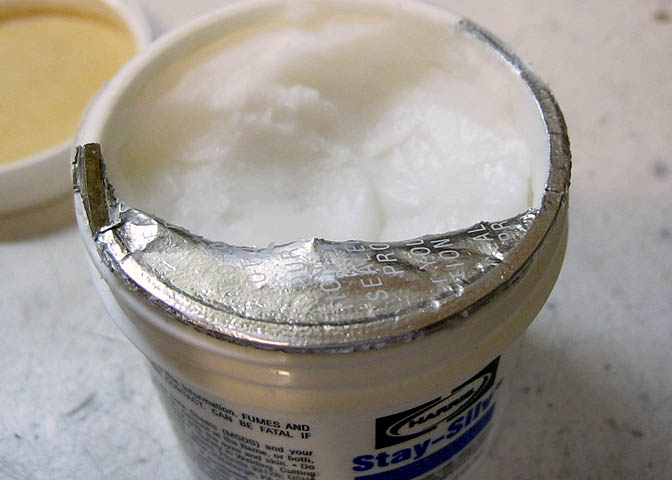
Here you can see what the brazing paste flus looks like. It tends to get dried out, and if yours does, just
put a few drops of water in it and stir it up well.
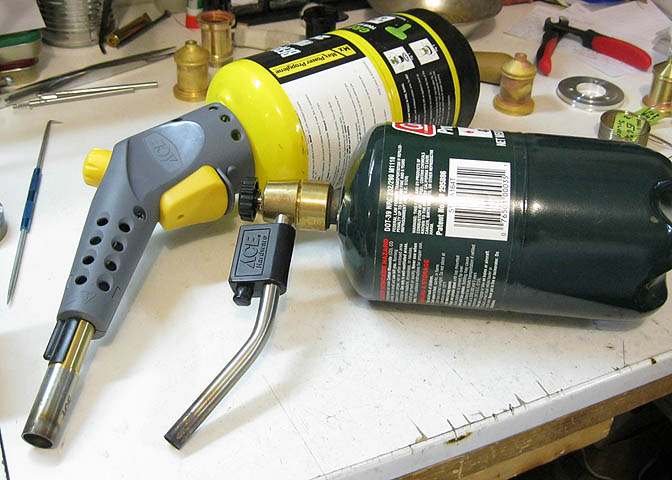
Finally, you need heat. Plenty of it. The brazing alloy wires I showed a few pictures above all melt at well
over 1000 deg F. Unless it is a very small item to be brazed, I will use two torches. I have one that takes
MAPP gas, which gets a bit hotter than regular propane. However, propane will get the job done too, as long as
you have a couple of them with large-ish heating tips. The one attached to the green gas bottle is a propane
tip. It rotates freely and with it I can lay that bottle down on its side and direct the flame from the nozzle
to where I need a stationary heat source. Then I use the yellow MAPP torch for moving around to apply locally.
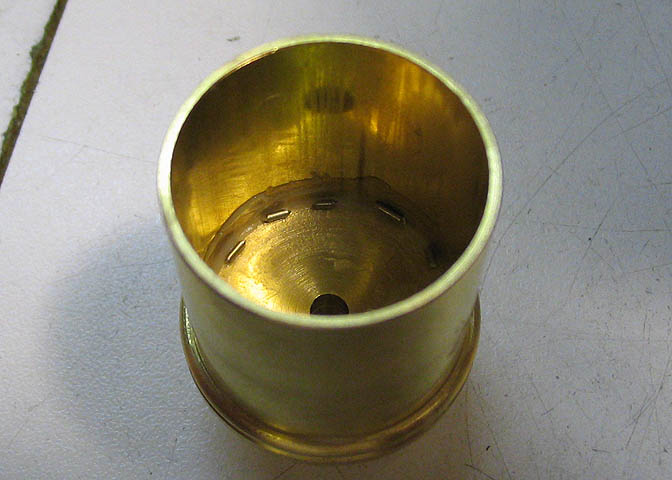
To start, I put brazing flux anywhere I wanted the silver to flow. The silver will follow the flux and heat
once things start getting good and hot. On this one, I used a number of small pieces and pushed them down into
the flux. On the rest of the pieces I did, I just cut a small ring of my thinnest wire and placed it down
inside the boiler shell, next to where the joint will be.
Upon heating, you will first see the flux steaming away the water it contains, then it will go to a crust and
stay that way for a short while. Keep pouring the heat to the metal parts from the outside, and soon you will
see the flux go from its crusty state to more of one looking like thin syrup. Things are getting ready to happen.
As the work piece starts to get red hot, the flux will turn to a thin liquid and easily seep into the tiniest
joint. About that time the brazing silver will start to melt. Keep the heat on, and shortly the silver will
simply run toward the now liquid flux, and attach itself to the joint, finding its way into little crevasses
you can't even see. Keep it at that heat for a bit while you have a good look to see it has flowed all 'round,
then back off your heat and turn off the torches.
Let it set for a few minutes to make sure the silver has solidified. Then you can pick it up with gloves
and move it to a cooler place while you work on your next piece.
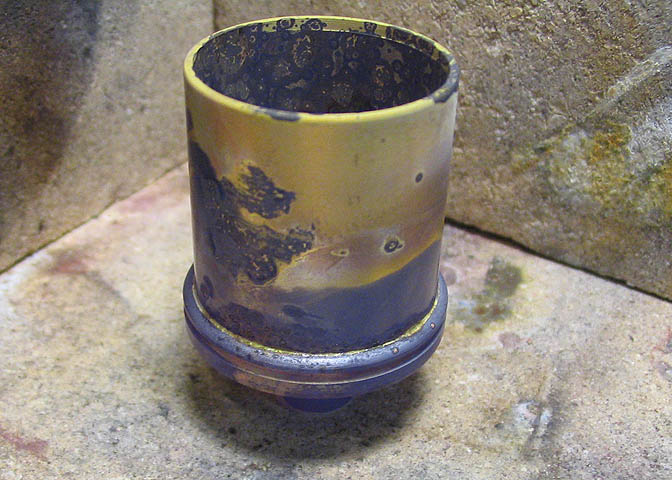
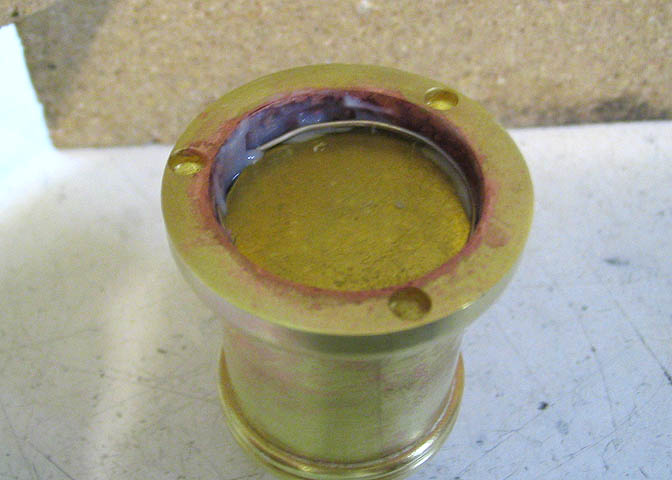
Here is the piece after it's had the heat put to it. As you can see, it gets very discolored.
Once the piece has cooled off to around 500 F or so, you can put it in the pickle and clean it up when you get
around to it. I use pure Vitamin C Ascorbic Acid for my pickle. You can get it at health food stores. Mix
one 500 gm bottle with three quarts of distilled water and stir well. It makes a supurb pickle and it is
safe for your hands. You can even eat the stuff, but not after you've used it for a pickle!
An hour in the pickle will have most all the discoloration off your piece, and it can be polished up with steel wool.
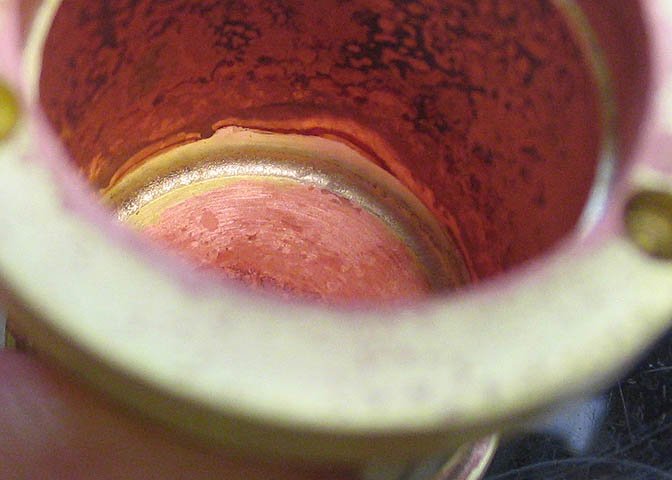
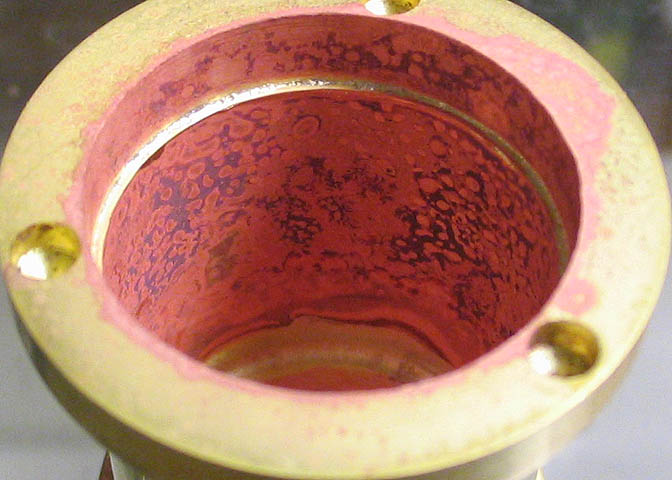
This is the bottom joint after a half hour in the pickle. You can see the nice fillet in the corner where
the top of the boiler meets the boiler shell.
The joint for where the shell meets the bottom of the boiler end piece was done a little differently. Since
it has a very shallow ledge to hold small bits of silver, and a ring of silver would simply have fallen to
the bottom once it got hot, I just fluxed over this joint and got it up to temp. Watching the flux, when
it turned to a syrup, then to the thin liquid, I knew it was about the right heat, and I fed wire into
the joint as I moved the torch flame around the piece. The silver follows the heat right around, and it's done.
If the entire piece us up to temp, the silver will flash clear around the entire joint in an instant. That
will happen on things that aren't too large. On larger pieces you often have to 'chase' the joint with the heat.
Above is a pic of that joint after cleaning in the flux. Just go easy on how much silver you feed into the
joint so it does run down the side, and all will be well.
The bottom boiler plates are brazed in next. I cut these bottom plates out of brass sheet using shears,
then flattened the edges gently with a mallet. I used silver wire that was .025" diameter for these pieces.
It's easy to form into a shape that fits well into the recess in the boiler bottom piece. This particular
one shows a bit of excess flux. Didn't need quite that much, and it just makes more to clean later.
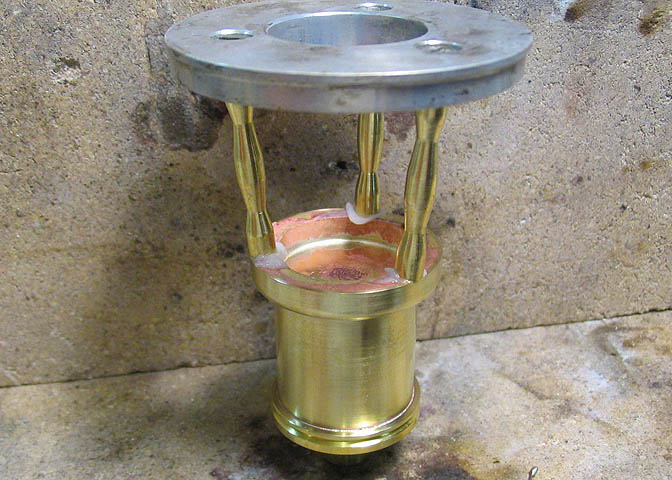
Last step in all these brazing sessions is to do the legs. The holes in the aluminum base are counter-
sunk at an angle so the legs point in the right direction to meet the holes in the brass base. The
holes in the brass base get a dab of flux and a couple small pieces of silver wire in the bottom. Then
the legs are put into those holes and heated for one last brazing.
As the base and leg is heated, the flux boils, then flows all around the joint. The silver wire in the
bottom of the leg holes starts to run upward, toward the legs. A final touch of silver from the top
side instantly draws all the sliver into the joint, and that's it. Another cleaning and polishing, and
all the fire making and water boiling part of the thing is done.
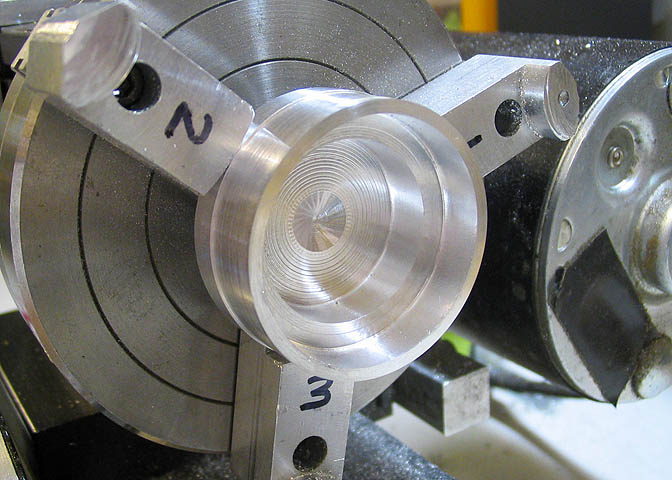
I made a jig to help in cleaning the pieces after brazing, and wanted to show it so
you see how it's done. This could have been put anywhere in the boiler building text.
This is just where it landed.
The piece starts as a slug of aluminum round. Two diameters are bored in. One diameter that will fit the
top of the boilers, and the second one that will fit the base piece of the boilers. Depending on which way
the jig is turned, it will hold either end.
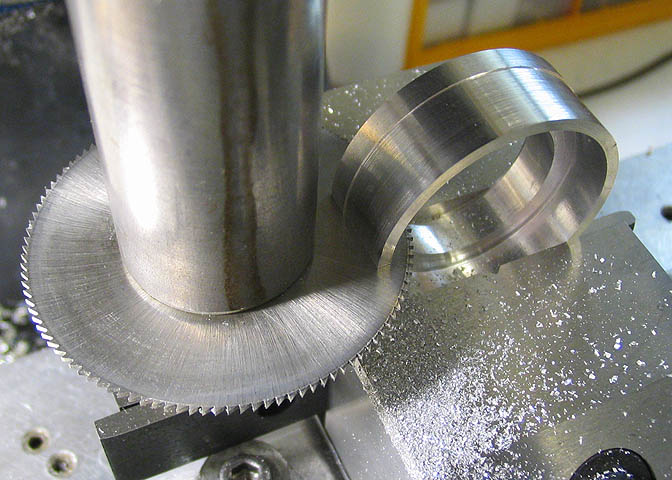
When the piece is turned and bored the way I want it, a slitting saw is used to cut it in half.
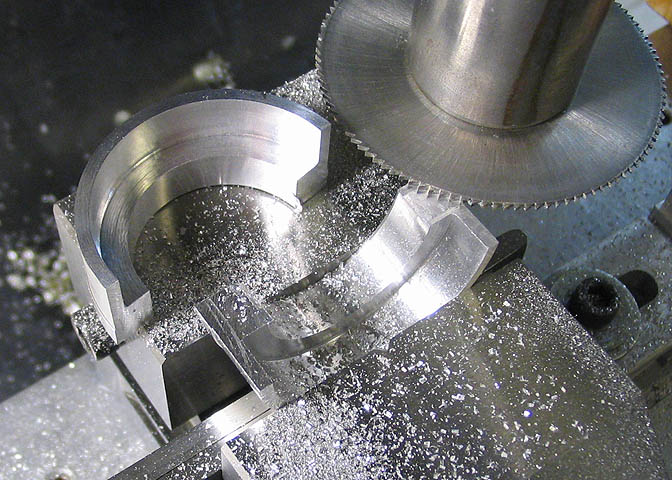
Second side cut, and it falls into two pieces.
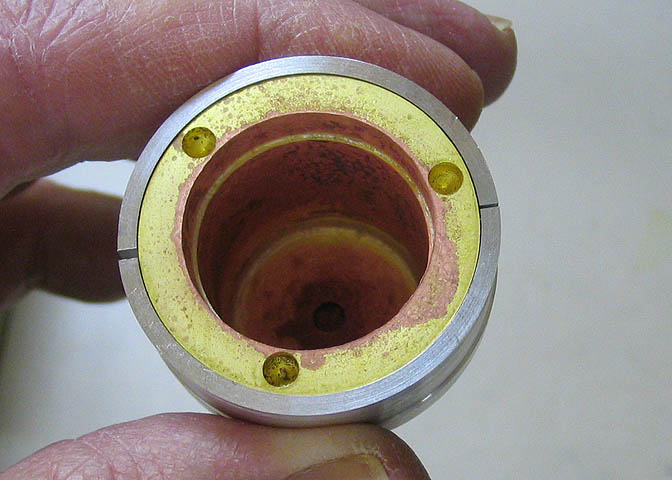
Here, you can see how one end holds the boiler bottom plate. Turn it around and it will hold the top.
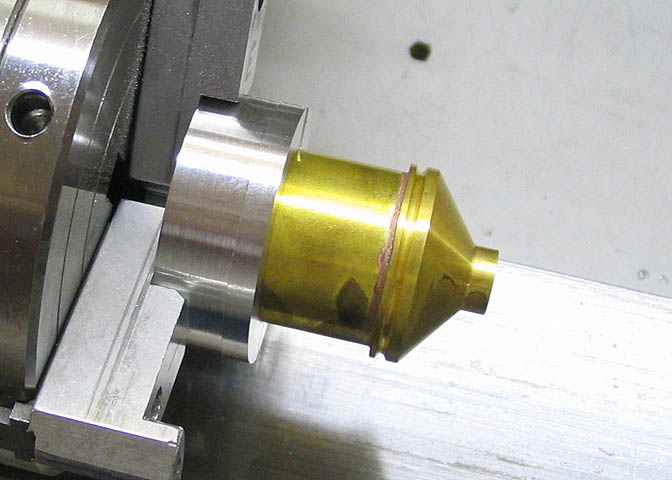
Either end can be cleaned and polished. I used extra fine 3M abrasive pads to clean them well, then
4 ought steel wool to polish them.
Between all the silver brazing steps involved with these things, I cleaned each piece as just described.
When you've got a lot of heats and soaks in the pickle, each time one pickling step leaves a little
streak or smudge of black, it seems harder to get it off after the next heat, so I just do the 3M pad
cleaning between heats.
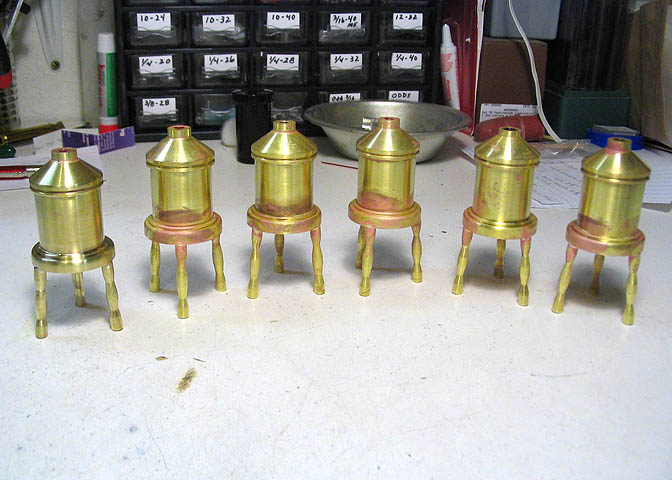
Now that I have six boilers done, time to move on to the engines.
Please go on to Part 3.
Go to:
Part 1
Part 2
Part 3
Part 4
To go back to the main projects page, click the link below.
More Taig Lathe & Mill Projects
Copyright 1998-2012 Dean Williams