The Dividing Disc
The indexer isn't much use without some dividing plates. I've made a few for mine.
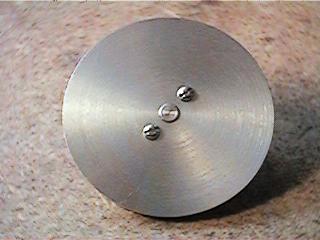
This is the back side of one of the, and the dividing holes aren't visible here.
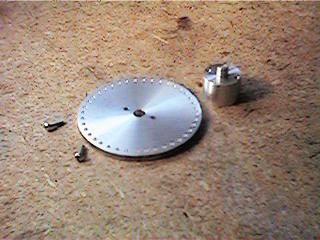
Here you can see the dividing holes and the components that make up the disc.
The unit consists of the disc and arbor to mount the disc on, which is then mounted
on the indexer arbor shaft.
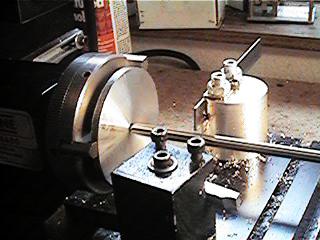
The disc is turned to what ever size you need to take an appropriate number of holes for
the project you need to index. A central hole is drilled and reamed to fit the arbor that the
disc will be mounted on. On mine, I drilled and tapped two holes to fasten the disc to the
arbor securely.
Here is a method of dividing a strip of paper into a number of equal parts. This can then be used to
drill your dividing disc. First of all, you need to cut a strip of paper that is about the width of the dividing
plate that you want to drill out. The strip of paper needs to be a little longer than the circumference
of the plate. Then wrap the strip around the plate snugly, and use a razor to cut straight across where
the two ends of the strip of paper overlaps on the circumference of the blank dividing plate.
You will then have a strip of paper that is the same length as the circumference of your dividing plate.
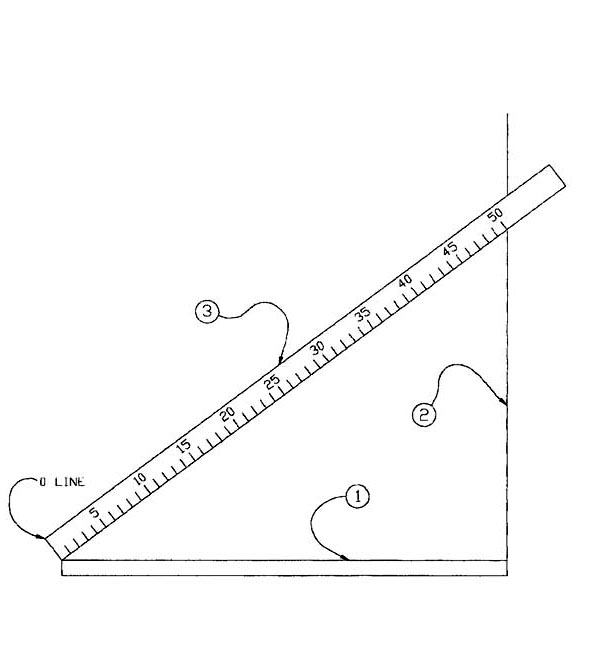
You now need to tape the strip to a flat surface, using a little piece of tape at each end. The strip
of paper is represented by item 1 in the drawing.
Now take a square, and with one leg of the square along the bottom of the strip of paper, draw a
line as in item 2 in the drawing.
Now you can use any kind of rule that is marked with enough increments to lay out your strip of paper
with perfectly spaced marks. In the drawing, the strip of paper will be marked with 50 equally spaced
increments. Use tape or clamps to hold down your measuring rule (#3) and then run your square along
the bottom edge of your strip of paper, marking it at each desired increment from the rule.
Once this is done, use rubber cement to attach the strip to the circumference of the blank dividing disc.
You can then mount the disc to the indexer, and using any kind of convenient pointer, drill out the
dividing holes in the disc with a center drill.
Using this method you can get any number of dividing holes needed for your disc.
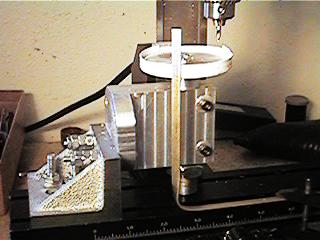
Once you have your dividing strip of paper marked out, it is attached to the circumference of the
disc, and drilled at each marked increment. The brass strip you see pointing up above the disc
is what I used to index the marks on the strip of paper around the disc. Be sure to tighten down
the lock studs in the indexer before drilling each hole. Then loosen them, rotate the disc to the
next mark, and tighten them again.
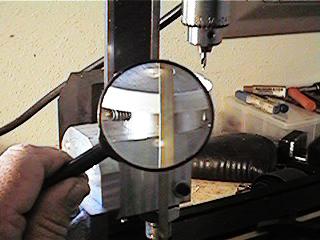
When you do get around to drilling the indexing holes in the plate, use a magnifying glass
to help you make accurate divisions.
So, I got a Taig..
(The start of my little machining section)
deansphotographica.com
(home page)
copyright Dean Williams
Feb 2000