Atlas Spindle Adapter
The spindle nose on my Atlas is threaded for 1"-8 threads. I have a Taig lathe too, and
it takes chucks threaded for 3/4"-16. It would be great to be able to use the smaller chucks
on the Atlas sometimes. For instance, my dividing head has the same thread of 3/4-16, and
using a chuck that fit that thread on the Atlas would be a good way for turning up gear blanks
and transferring them directly to the dividing head without removing the work piece, and then
having to dial it in again.
So, anyway, that's what brought about this little project. It can be done just as well for lathes
with a different spindle thread by making that change when it comes time to do the threading
job on the piece. It is also a good way to make your Atlas adaptable to collets like used in the
ER system. This type of collet is held in by a closer, and therefore will let work pass clear
through them. You'll see a little bit of that type of work here, but the main article for that type
of collet will be another page, when I get around to it.
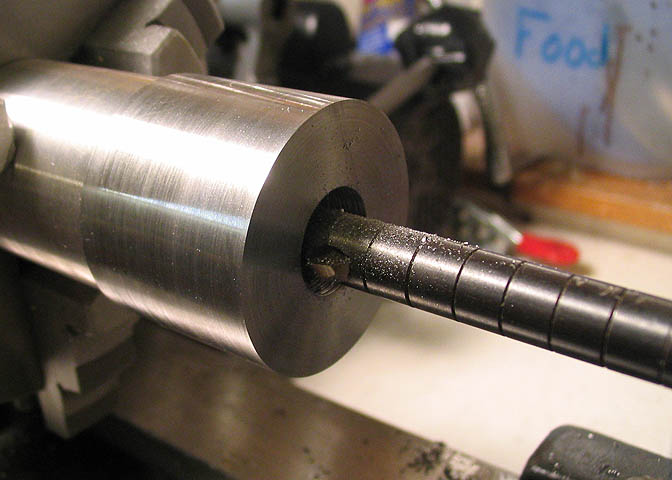
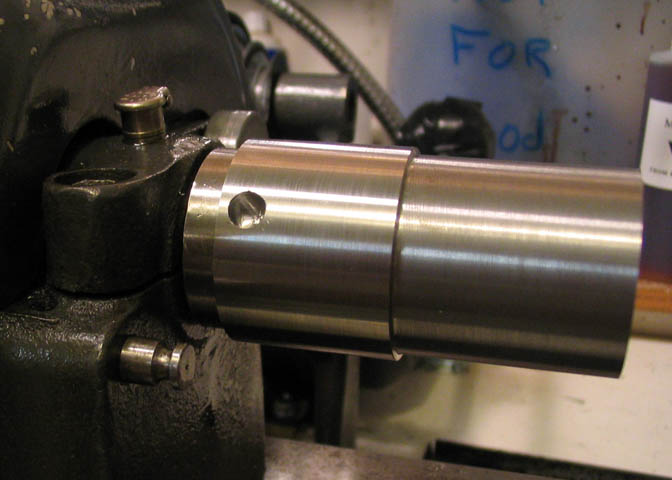
The piece starts out as CRS round stock. About 1.75" diameter and 3" long will do.
This write up will have measurements for a 1-8 spindle thread, so if you have a different spindle nose
on your lathe, make adjustments as needed.
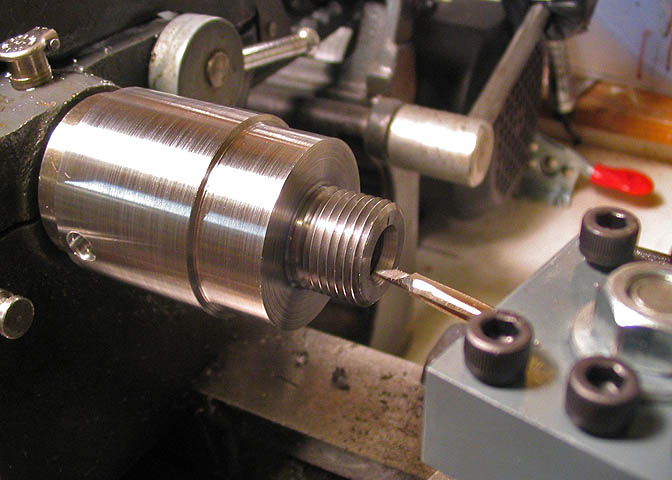
The end is faced off, center drilled, drilled, and bored to a depth of 1.5" and an I.D. of .875".
The piece in the picture shows a stepped diameter, but that is not for any purpose in building
the adapter. It was just the shape of the piece that came out of the scrap bin.
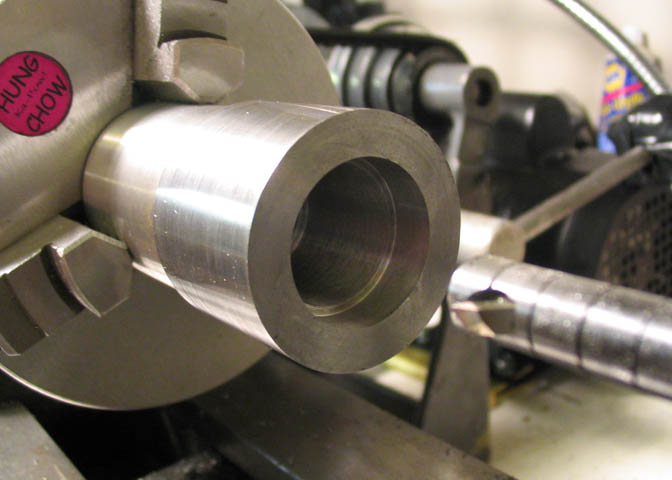
After the initial bore to the bottom, a free bore must be cut for the nose register on the lathe spindle.
In the case of this lathe, it is 1.005 diameter by .320" deep, and it ends where the threads will begin.
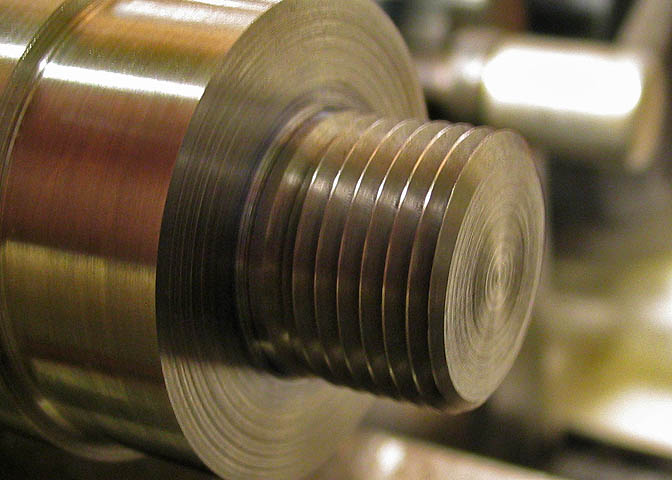
Where the threads end, near the bottom of the bore, there will need to be a place for the tip of
the threading tool to run off. The total threaded length is .750", not including the free bore at the
beginning of the bored hole. Behind that part that will take the threads, the bore is opened up
similar to the free bore area at the beginning of the hole. This will let the threading tool run off
the thread it has just cut, without bumping up against a hard spot where the thread ends.
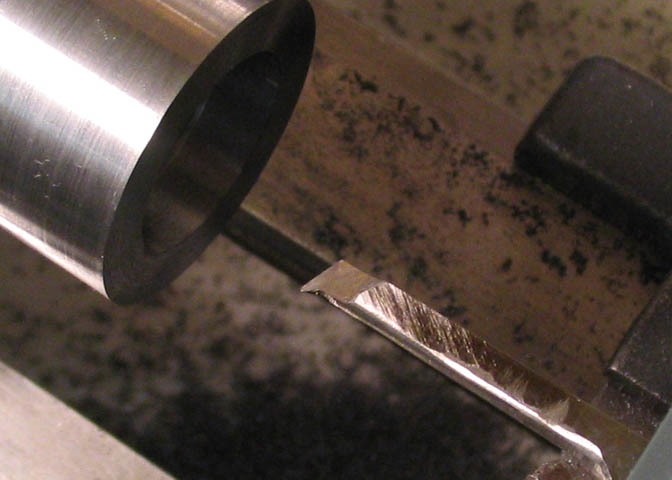
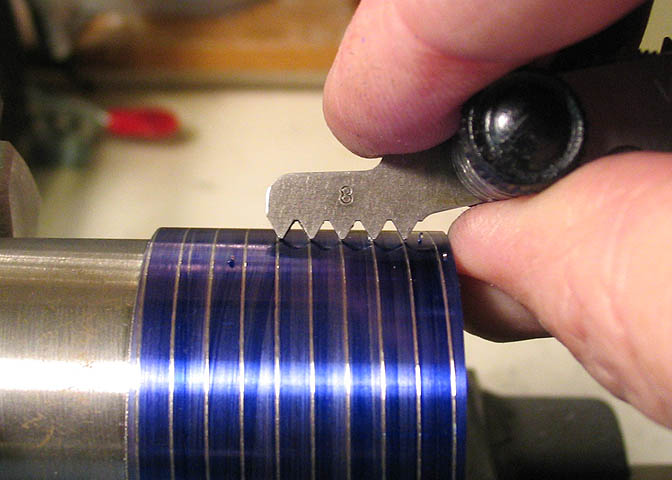
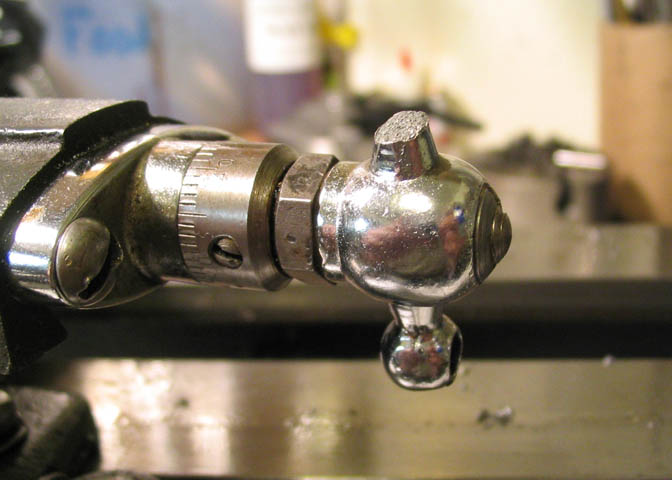
This tool with a hook on the end was used to cut the thread run off in the bottom of the bore.
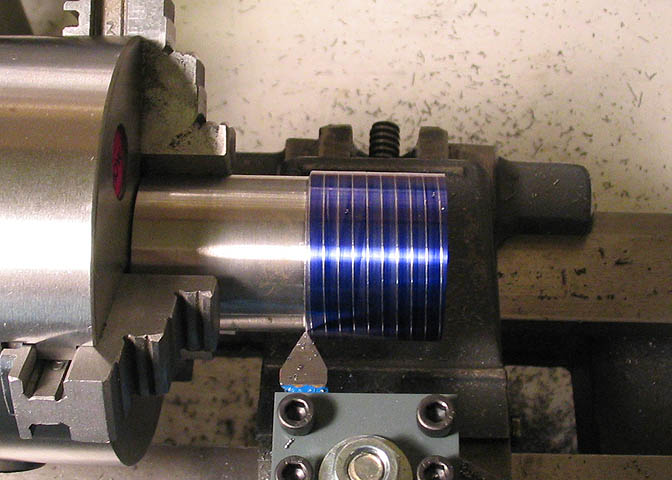
Now the bore is ready for threading, and the pick-off gears on the lathe have been changed for 8 TPI.
Since I can't really see very well inside the bore to run a test scratch, I just ran it on the outside of the piece.
It's only about .0005" deep, and will be turned off after the internal threading is finished.
The scratch shows I have the change gears set up properly.
Time to set up the threading tool to cut the bore.
There are not going to be any threads on the outside of this end. This was only
done to check the gearing on the lathe.
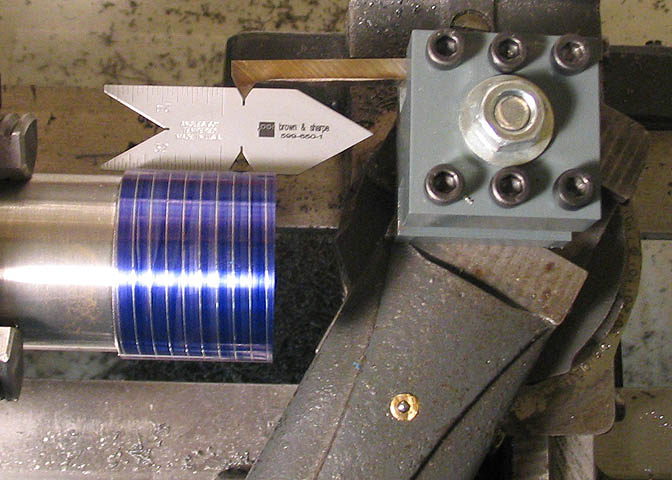
A 60 deg threading tool is ground up from 3/8" HSS, and set to cut square. The compound is set to
29 deg, same as for cutting external threads, except the 29 deg is set on the other side of zero on the
scale. It works the same way as outside threads, except the feeds on the dials of the compound and
cross slides are done in reverse. In other words, the compound is cranked toward the operator to feed
the tool, and when backing out to take another cut, the cross slide is cranked away from you, to clear the
threads that have been cut when returning to your starting point.
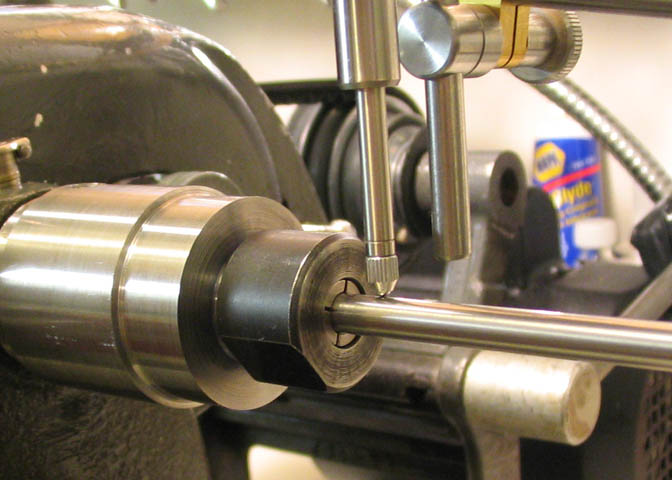
With the lathe off, the tool tip was set at the starting point for the threads, inside the bore, then cranked in
toward the headstock where the threads are meant to end. The DI holder on the lathe is set so the needle
starts to move just as the thread ends. This is done so I will know when to disengage the halfnut after taking a cut.
After a bit of back and forth, keeping an eye on the thread dial and my stop point for the threads,
the job is done. When the threads had started to take shape, I started checking them for fit on
the spindle. The entire chuck was removed while doing this, never disturbing the work piece in
the chuck jaws. Done like this, you never loose your place when picking up a new thread cut.
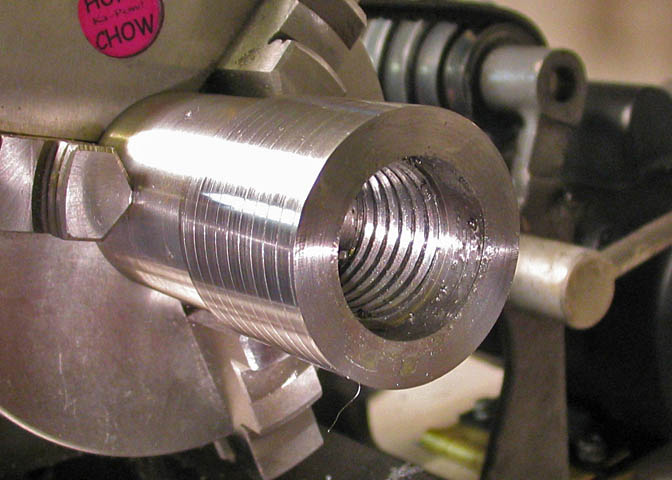
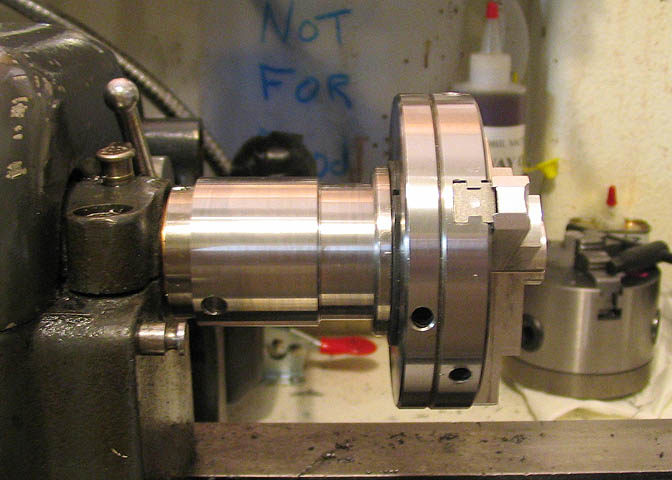
Here the piece has been fitted to the spindle for the last thread check. Everything mates up well,
and the chuck that is hanging on its end runs out true.
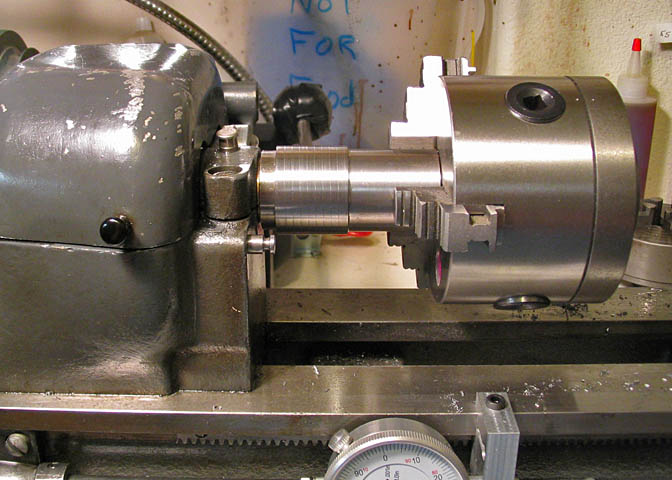
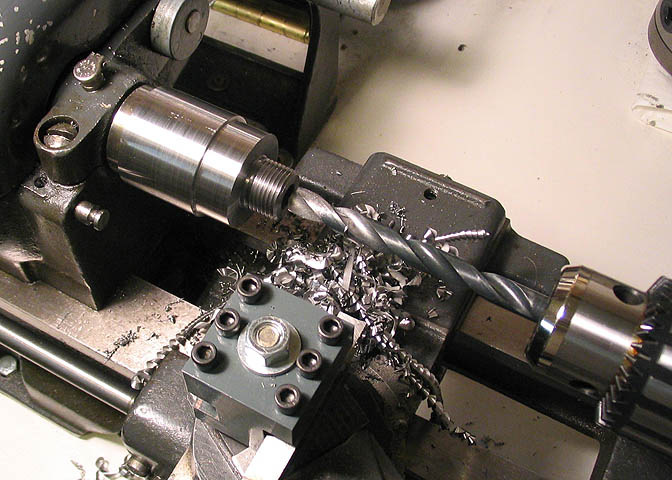
Now the scratch mark on the big end is turned off, and a 1/4" hole has been drilled in the
end for a breaker bar to help in removing the adapter from the spindle.

Faced off the end, which had a great big divot in it from some other project long ago. Then turned down
the end to .750" for the needed 3/4"-16 threads. Then thread it!
Same procedure as that already outlined earlier, so I won't go through it all again. The only difference is
these threads will go on the outside, and they're a different size.
After a bunch of back and forth with the carriage, I end up with some decent threads
to take the three and four jaw Taig chucks.
This is how it fits up with a chuck. A DI on a test rod shows up under a thou. Not bad for a
scroll chuck with soft jaws. Better than what Taig says it will do, actually. The adapter itself
runs out at zero on the DI.
I put a 3/8" bore down the center, so I can run smaller stock through it.
That's not the only reason for this hole. I'm going for a twofer on this adapter, because I can.
My Taig lathe uses a 15 deg collet system, (30 deg inc.). No reason not to have the same setup
on this thing. The Taig collets aren't super precision, (and they aren't made to be), but they're okay.
All of mine run out to less than .001" when in my Taig lathe.
So, anyway, got a small boring bar and cut the taper in the adapter for the collets.
I worked on a nice finish in the taper bore. Wasn't as easy as it could have been, with Ol' Stumpy, here.
It's sometihng that will have to be fixed before I make my collet chuck for ER collets.
I used up my last bit of Hi-Spot to check the taper before I had it cut to completion. Hit it on the first try
from the look of things, though Taig collets are a somewhat "textured", so it's a little hard to tell.
And there we go. These ran out to just what I expected from Taig collets, which is, again,
less than .001". That's all you can expect from them.
This thing is done. Nothing else to see here.
Thanks for having a look.
More Atlas Projects
More Taig Lathe & Mill Projects
deansphotographica.com
(home page)
Copyright Dean Williams