An ER Collet Chuck for the Atlas 618
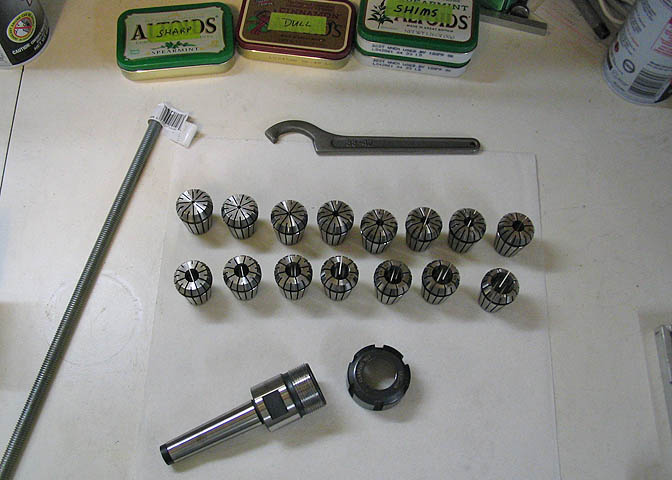
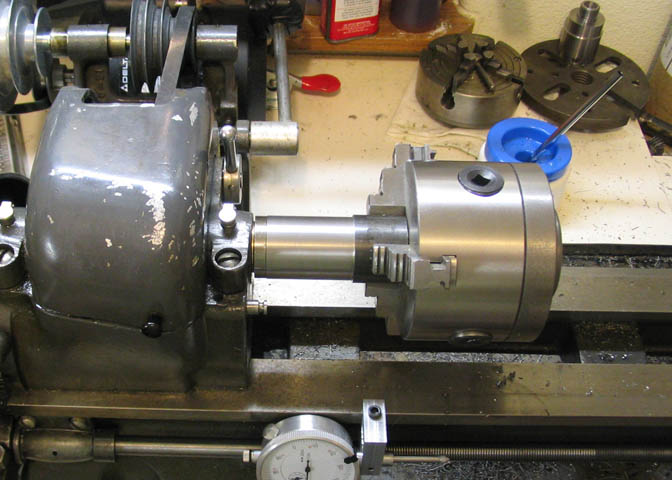
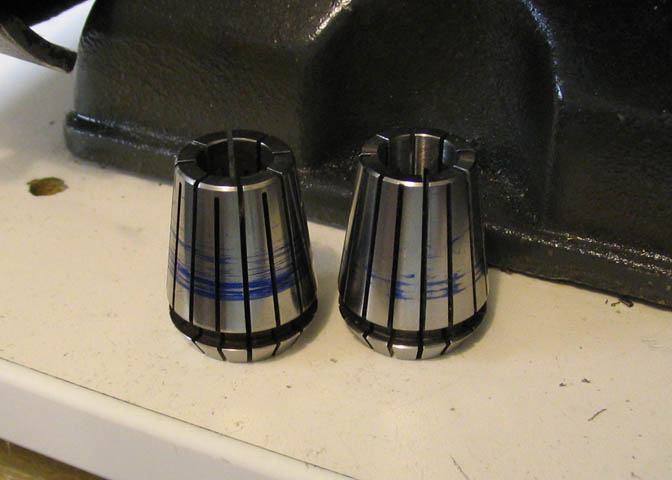
I recently got this set of ER25 collets for my Atlas 618 lathe. The collet closer is on a 2 MT
that fits the Atlas spindle taper. This should be great for turning small diameter pieces. The
largest collet will take a 5/8" diameter piece, and the full set goes down to 3/32". I also ordered
an extra collet to fill out the set on the small end. I couldn't find a 1/16" collet, so I got one
in 2mm, which will close down to 1/16".
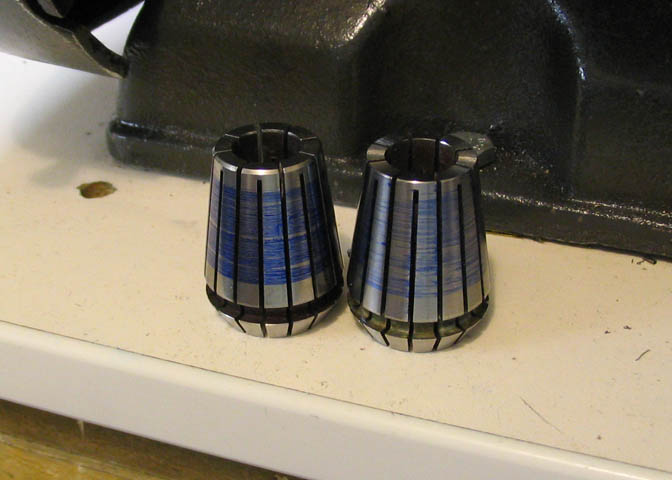
ER collets have a large clamping range per individual collet, so a full set means fewer collets
are needed for a given material diameter range. The "ER25" is the type of collet itself. There
are a number of different ER collet types. They are numbered from ER8, which will hold
very small stuff, up to ER40, which holds up to a bit over 1" diameters. The ER numbers
are not interchangeable. In other words, ER25 collets do not work with ER16 collet holders,
and so on. I picked the ER25 series because it represented a good range for the size of work
I want be able to hold using collets. Anything larger than 5/8" will have to go into a regular
three or four jaw lathe chuck. The ER collets are meant to be quite accurate, when compared
to something like a regular three jaw scroll chuck, and in the smaller sizes, this is what I want.
As it is, this collet set and the "closer", (the nut that squeezes the collet against the work piece)
will do most of what I want just like I bought it. However, since the back of the collet chuck
has the 2MT tang, material cannot be passed completely through the collets. This is not
a big deal, but I have regular jobs that come in that need many pieces made from a piece of
round stock of a given diameter. If I could pass round stock completely through the collet
and through the spindle, it would save on material, and make a fast setup for turning pieces
that involve a number of repetitive steps. So, I'll make a collet chuck that mounts right onto
the spindle of my 618 lathe, leaving the inside of the chuck hollow so work can be passed
completely through the collets and into the spindle bore.
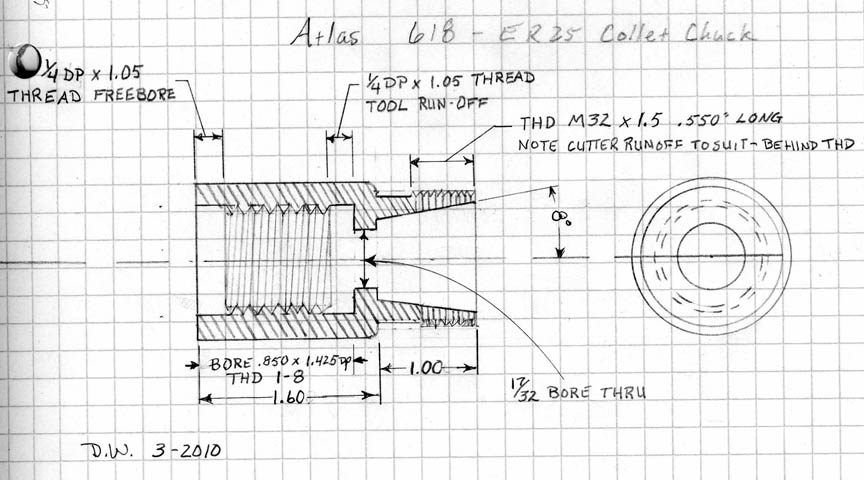
This is all the "drawing up" that I did for this project. If you want to use these dimensions, feel free, but
keep in mind this is just a scratch up, and you should check it over for goofs. One thing right off that I changed
as I went is the dimension given for the smallest bore. It says 17/32". It needs to be a little bigger. I made mine .720".
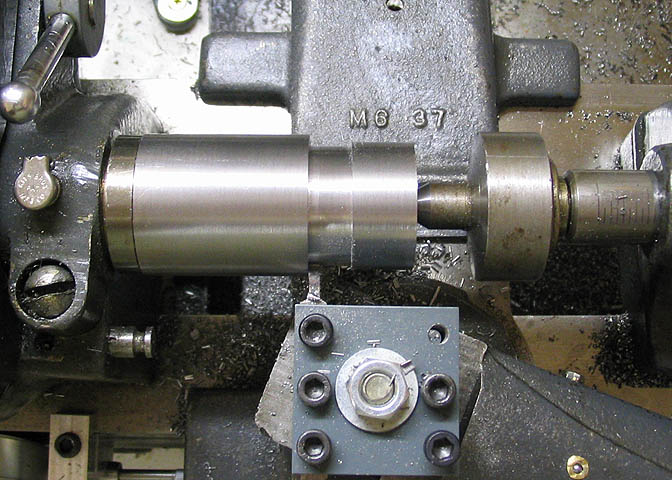
First step is to prepare a piece of round stock that will screw onto the spindle nose of the lathe.
For a collet chuck of this size, I think that most any steel would be appropriate. That said, I
would avoid common A36, usually just called HRS. It's one of the worst machining steels,
and you might as well make it easy on yourself, and your tooling, if you can. Leaded screw
machine stock would be a good choice for it's good strength and excellent machining characteristics.
There are a number of these stocks available. The best known in home shop circles is
probably 12L14.
I chose to use 1144 stress proof, simply because it's what I had available in a suitable diameter. It
doesn't machine as easily as the leaded steels, by quite a ways, but it's still very usable for the
small lathe operator. Worlds better than plain HRS.
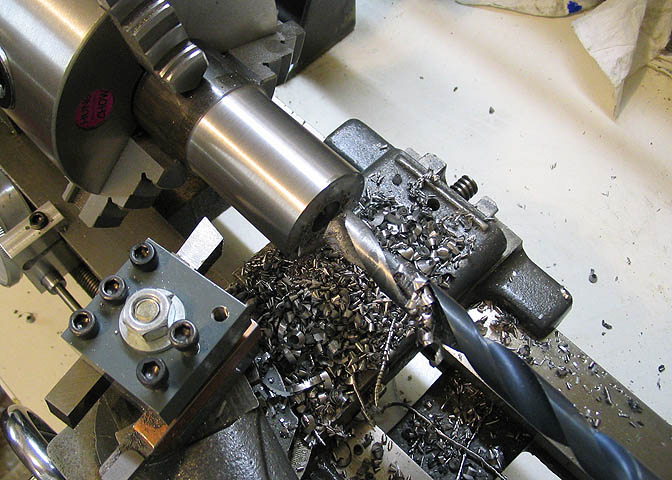
In the shot above, the piece has been cleaned up on the OD, and a 1/2" hole has been drilled
down the center, but not all the way through the piece. Leave about 1/2" at the bottom of
the hole un-drilled, so a centering drill can make a 60 deg spot in the other end for using
a tailstock center in a later step.
Then the piece is bored to size for the spindle threads on this particular lathe. This is an older
Atlas with 1"-8 spindle threads.
The piece is checked closely for proper ID before the next step.
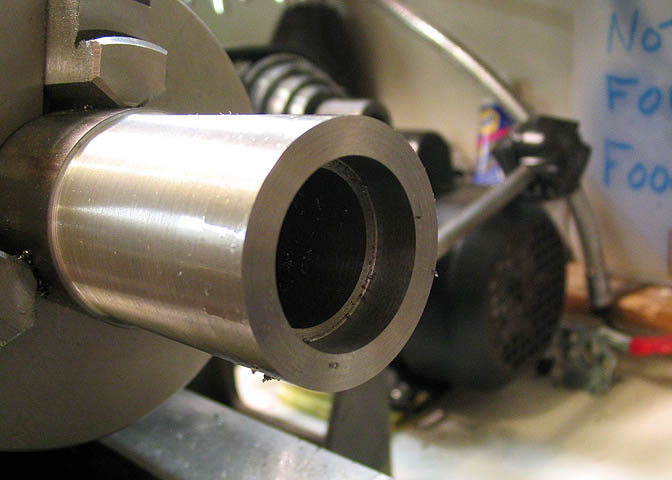
A free bore section is bored to fit the unthreaded part of the spindle nose directly behind
the spindle threads. A similar section is bored out near the bottom of this hole to provide
a place for the threading tool to run off at the end of the internal threads about to be cut.
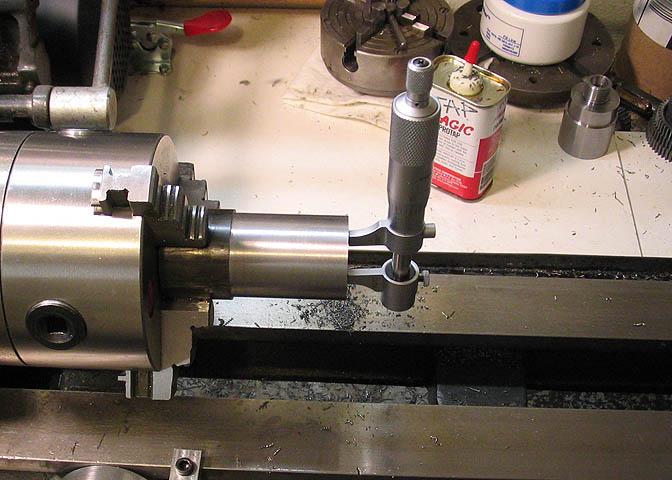
Now the lathe is setup for cutting 1"-8 threads. To check that I had the proper change gears
setup before cutting the internal threads, the chuck with the work piece was removed, not disturbing
the work piece, and another chuck was put on the lathe spindle with a piece of scrap stock chucked
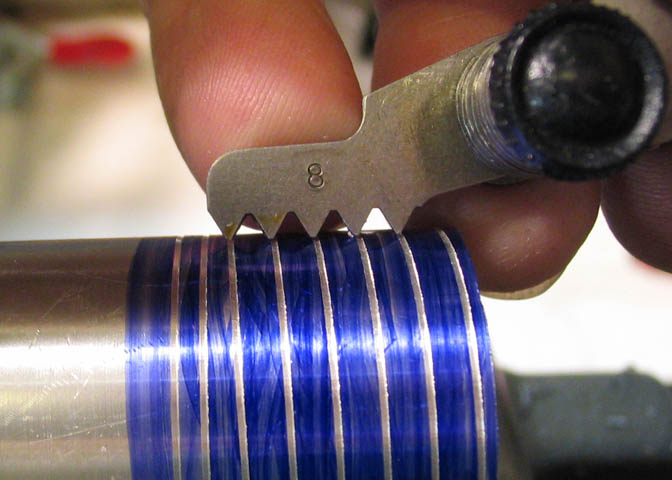
up. Then a scratch thread was cut and measured with a thread gauge.
The chuck with the work piece is returned to the lathe spindle.
The compound slide is set to 29 degrees and the internal threading tool set up square
with the work piece using a fishtail tool. The cross slide is set at zero, and the compound
is used to put on each cut. This way, the cross slide can be used to move the tool IN each
time a thread pass is completed, so the carriage can be cranked back out of the hole. Then
the cross slide is returned to zero, which will put things exactly back to where they were at
the end of the last cut. Then the compound is dialed back towards the operator a few thou
for the next cut. Keep it up for a while, and pretty soon you have your threads cut.
When the threads start looking about right, and before the threading tool starts to cut the
recess in the front of the bore, the whole chuck and work piece are taken off the spindle
and checked for fit. This may have to be done a few times, taking a cut, then trying the thread.
The work piece must never be removed from the chuck until the threads are finished.
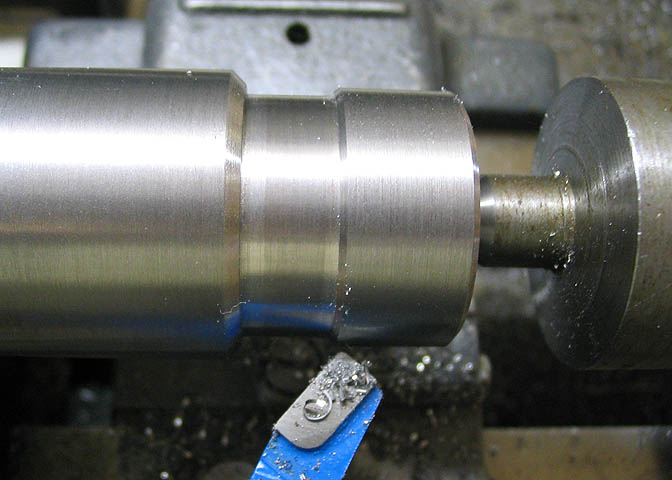
The above picture shows the piece being fitted up after its final pass with the threading tool.
Now the piece can be removed from the chuck and mounted on the spindle as it will sit in
normal operation. Be sure the threads and register on the spindle and the work piece are clean.
This will assure everything remaining concentric.
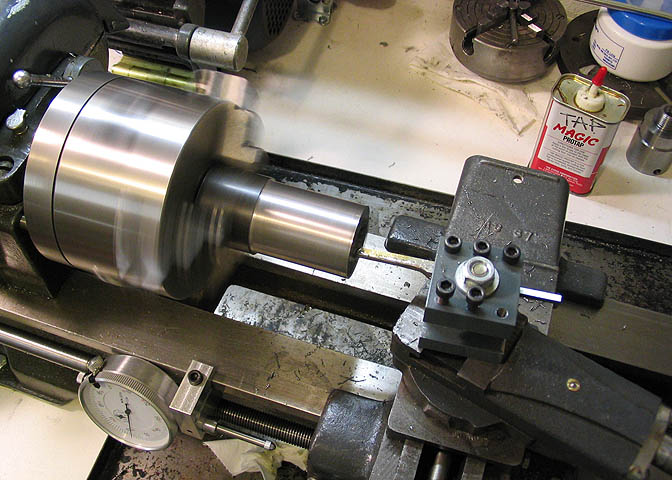
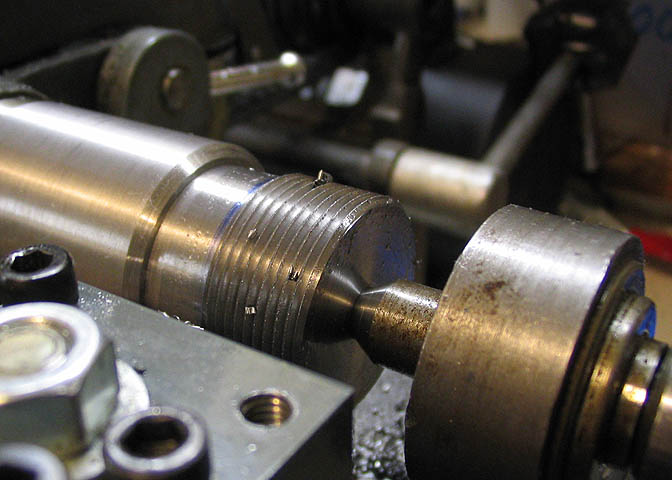
The piece is then drilled for a tailstock center, and the diameter on the end is turned down for
the proper size to take the m32 x 1.5 threads. The area right behind where the threads will end
is turned down to just under minor diameter for the threads, so the cutting tool does not bump
up against a shoulder at the end of its cut.
Last step before cutting the threads is to put a nice chamfer on all the edges. It cleans up the
looks of the thing a bit, and on the very end, makes a nice start of the threads to help the
collet closer nut start.
Time to cut the m32 x 1.5 threads. The little Atlas was made long before that pesky metric stuff
started making it's way onto American shores, but that doesn't mean it won't cut most metric
threads. Just takes a little change gear juggling, and things can be made to work.
A transition gear in the gear train would make pretty much perfect metric pitch threads, but that
gear, for just about any older American/Imperial machine is 127 teeth. That makes it rather large,
and on a machine the size of the 6" Atlas, you would have to either hang the headstock end of
the lathe off the edge of the work bench, or cut a hole in the bench so it would fit. Even then, I'm
not sure if you could use it and still have room for the other gears necessary for cutting the thread.
There is another way. Use what you have to cut an approximation of a metric thread. There
are a few gear train generating programs available on the interwebs, at no charge. I used one
called "nthreadsp" to come up with the gear set needed for this particular pitch of 1.5mm. That
program is available from the lathes.co.uk web site. I believe Marv Klotz has one too, and a
Google search of his name will turn it up.
For those curious about the change gears used for cutting this thread, see below.
KEY:
"B" = back position, i.e., nearest headstock.
"F" = front position, nearest gear cover.
"LS" = leadscrew gear.
"S" = spacer.
"C" = the gearset on the banjo nearest the leadscrew.
"A" = the gearset on the banjo nearest the stud gear.
The stud gear is the lowest gear on the tumbler reverse lever,
directly below the two small forward/reverse gears that change
the rotation of the leadscrew. On the Atlas 618, the stud gear
is a 16/32 tooth compound gear cast as a unit.
| LS B F S 44 |
C B F 40 52 |
A B F 46 S (idler) |
Stud gear 32 |
This change gear setup cuts a 1.5mm pitch thread that is calculated to give an error
of only 0.06%. That's very little error, in case you were wondering.
Here's the new thread, ready for the collet closer nut.
Now, something you need to know if you've never cut metric threads on your Imperial thread
lathe. You can't use the threading dial! The rotations of the leadscrew are meaningless to the
gearing on the thread dial, so you have to leave the half nuts locked at all times during the threading
process. Threading toward the headstock can be done as usual, but when you go to move the
carriage back toward the tailstock to start a new cut, you just have to wind the lathe backwards
while leaving the half nut engaged to move the carriage for you.
If you have a reversible motor, you're set. Just back out the cutting tool, put the motor in
reverse, turn it on, and turn it back off when the carriage is back at its starting point.
If your lathe motor is not the reversing type, then you will have to do as I do and run the
spindle backwards by hand to return the carriage for the next cut. I made a hand crank
that clamps into the spindle bore just for this purpose. When using it, the power to the lathe is
disconnected for safety reasons.
You can find the project pages for that in the Atlas section
on my main page, linked at the end of this article. Or you can go to it straight from here:
http://www.deansphotographica.com/machining/atlas/spindlecrank/crank.html
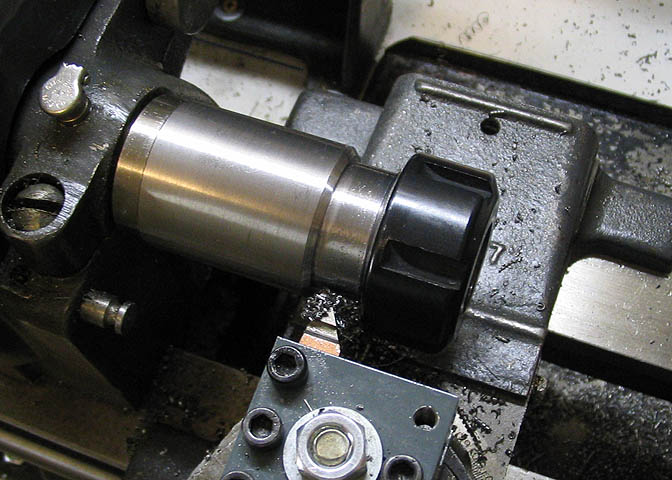
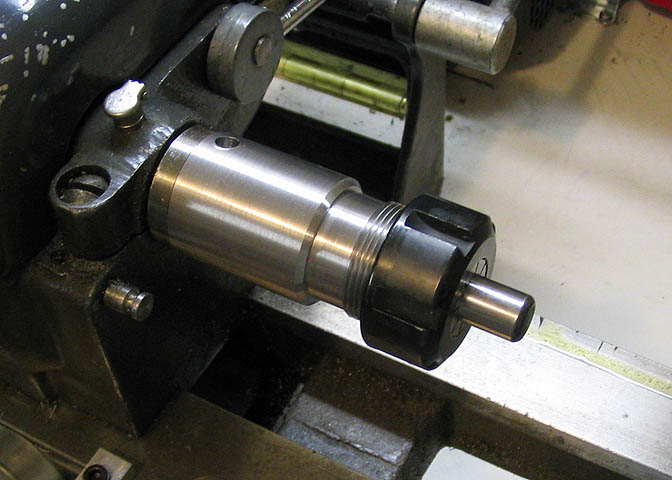
The nut fits perfectly, so, onto the next bit.
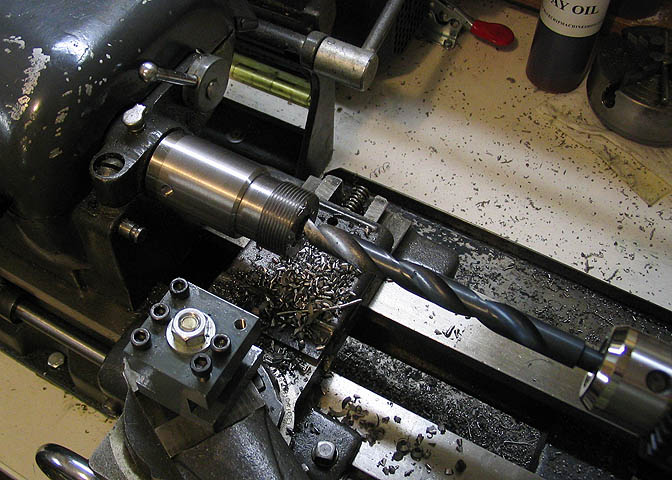
A 1/2" drill is run through the remaining bit of the closer, then a boring bar is used to bore it
through to a diameter of .720".

Time to cut the taper for the collets.
ER collets have a 16 deg included angle for the taper. It needs to be cut accurately if the collets
are to run true. I started by setting the compound slide for 8 deg, (half of the 16 degrees needed,
since 8 degrees cut on one side adds up to 16 total).
Mark one of the collets for full depth using the MT2/ER collet chuck.
A number of cuts are made, until the marked collet will go most of the way into the bore. Stop
when the collet sticks out too far by about 0.1" from the mark on the collet.
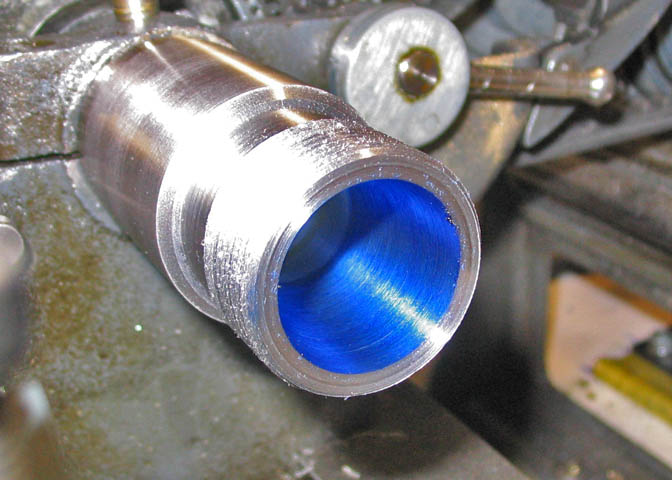
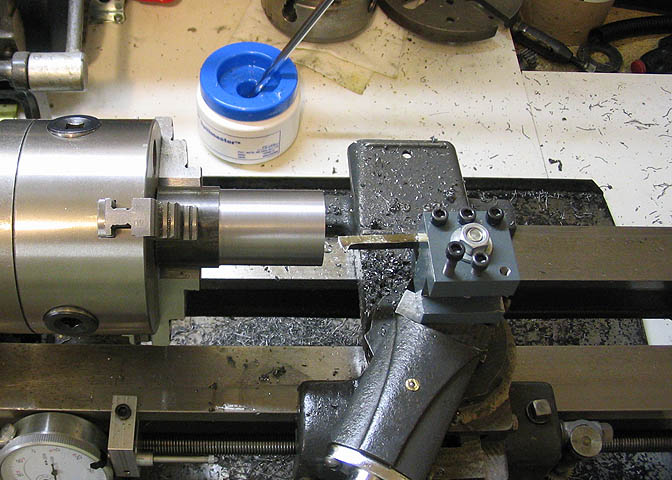
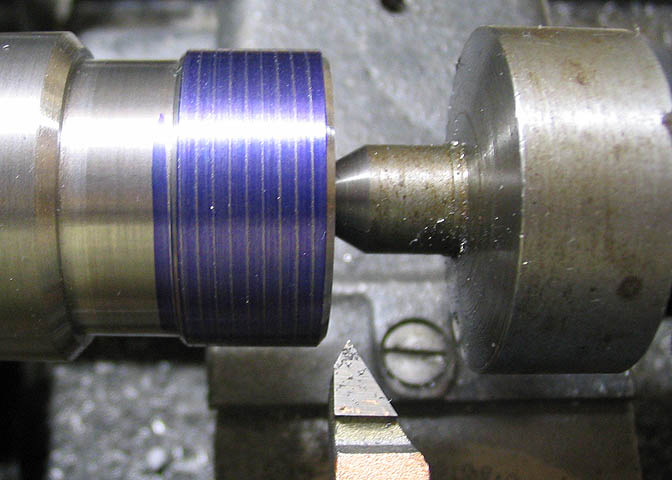
Sorry for this extra bright shot, but it was necessary to show the blue in the tapered bore. When
the taper has been bored as discussed in the previous step, it's blued with Hi Spot paste. It's a
transfer paste, and will leave blue marks on what ever you're checking. Cleans off easily with
rubbing alcohol.
To get a nice thin coat, put a small dab on a piece of glass, or wax paper. Wrap a few thicknesses
of tissue around your finger to flatten the dab out a little by rubbing it on the wax paper, just so
you get a light coat on the tissue. Then, with the tissue rub a thin coat of the paste inside the newly
cut taper in the bore. Don't leave any big blobs of the stuff, or it won't tell you what you need to know.
Take a collet and put it in the taper taking care not to rub it on the sides of the bore as you put
it in. When it's in the taper, hold it in lightly with finger pressure and turn it gently about half
a turn. Don't try to mash it into the bore. You just want the sides to be touching, not have the
collet compressed tight.
In the shot above you can see the result of my first try. The taper is quite a ways off, but
there is still plenty of cutting to do that will get it right. The Hi Spot is cleaned from the taper
and the collets, and the compound is adjusted just a bit for another cut.
After three or four tries, clean, adjust compound, cut, more paste, and fitting, I had the taper
to a point where it was nearly there. One more adjustment and I got it right, showing blue over
the entire area of the collet that went into the taper. After that, the cutting continued at that
compound slide setting until the collet that had been marked for length fit to proper depth, and
it's done.
I used a short ground test bar to check the runout to see if I had done any good. It showed
less than .0005" on my old Atlas. Not bad, since the collets are only guaranteed to .0006!
Thanks for having a look.
More Taig Lathe & Mill Projects
deansphotographica.com
(home page)
Copyright Dean Williams