Making a Nipple Wrench for a Black Powder Revolver
I do a little black powder shooting with an 1858 Remington replica cap 'n ball revolver.
It's fun, smoky, dirty, and I pretty much enjoy it. I clean the revolver after every use, as
most all black powder shooters do, due to the tendency of the powder residue to draw
moisture at a furious rate, leaving a good chance for rust.
One of the things I like to do during the cleaning chores is to remove all the cap nipples
for cleaning and oiling the threads, and even though I do this every time I shoot the gun,
the nipples often form a little rust on the internal threads, making them hard to remove.
This lead to a problem I've had with all the store bought nipple wrenches I've ever purchased.
Every one of them has broken at some point while trying to get them to do what they were
designed to do. They always break at the same place. The point where one of the ears
on the end of the tool is supposed to surround the nipple as you apply all the torque you can
muster on the short spanner rod included with these units.
In my opinion, that's just and example of poor manufacturing processes, and after going
through no less than five of these wrenches over the last few decades, and two of them
the last two weeks, I decided to do it for myself. Surely it can't be that hard for the manufacturers
to properly harden one of these wrenches, but it appears so, from my point of view.
As machining jobs go, it's not a very complicated build, and this one took me about four
hours, in all. I didn't draw up prints for this, but I'll give a few dimensions throughout this
short write-up for the curious.
If you want to try this for yourself, keep in mind that I made this tool to fit the cylinder on
my own particular revolver. It works with other revolvers I've tried with it, but I can't say
it will for for every revolver. You may need to make some adjustments.
It's basically the same design as those made by commercial manufacturers, but it won't
break if you harden and temper it properly. It also easier on the hands in use.
I started off with a piece of .375" dia water hardening drill rod long enough to face off
to a length of 2.25". On one end, a taper of about 3 degrees is turned for a length of
.35". Then a hole is drilled center to a depth of .5" with a #15 drill.
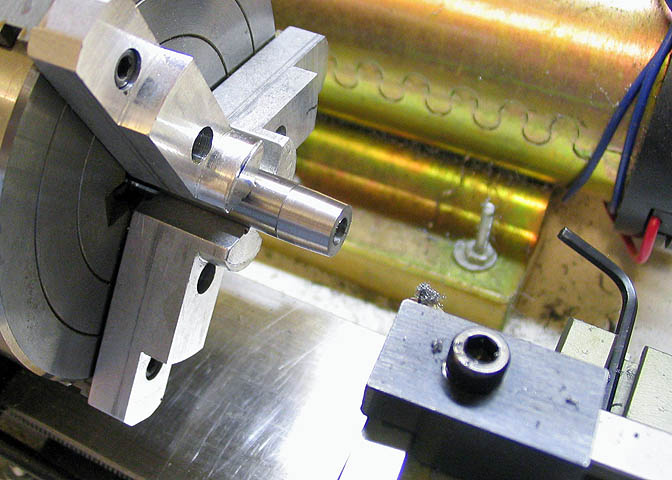
Next, center and drill a hole through the diameter of the shaft. I made this one 3/16" in
diameter and .565" at center, from the end of the "top" of the shaft.
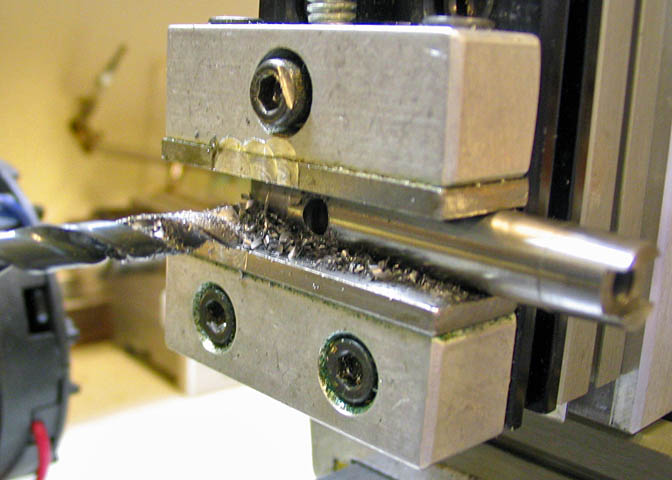
Next, put the piece back in the chuck, tapered end out, and where you had stopped
drilling the hole in the slotted end in the first step, drill the rest of the way through the shaft with
a #35 drill. Back out the bit often to clear chips.
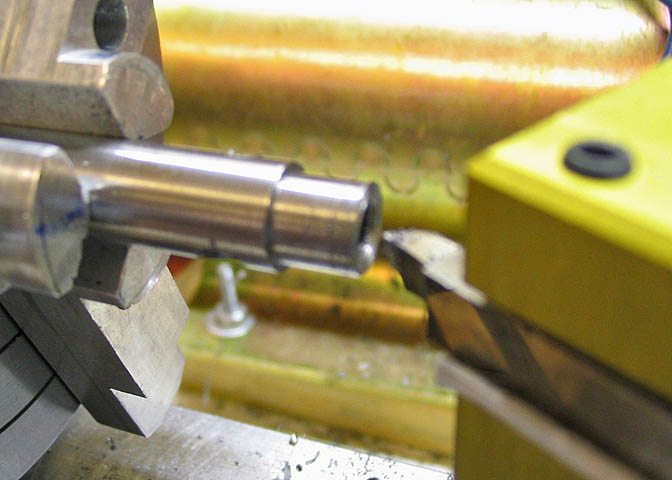
Now set up to mill the slot that will grip the flats on the nipple. I used a 1/8" four flute end
mill held in a collet. Make your cut anywhere from .075" to .10" deep. With small end
mills like this, take light cuts, especially if you have a lot of shaft hanging out in the breeze
as I have in this set-up. I used Tap Magic fluid for lube and never fed the mill more than .005".
Small mills are easy to break, so go easy.
When you have the initial cut to it's full depth in the center of the shaft, eat away at the sides
of the cut until you have a slot that will fit the nipples on your gun. I made this one .090" wide.
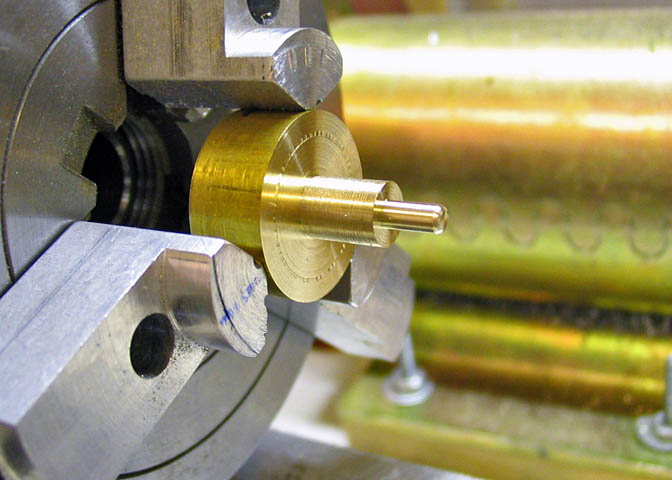
Back to the three jaw, this time with the handle end of the shaft made available for work.
Drill the end of the shaft for 10-32 threads and tap it so.
You can see that I have cut the end of the shaft down a few thousandths on the diameter
for a short distance. This serves no purpose, but I thought it would look better.
Strictly cosmetic, but it came out nice when all was said and done.
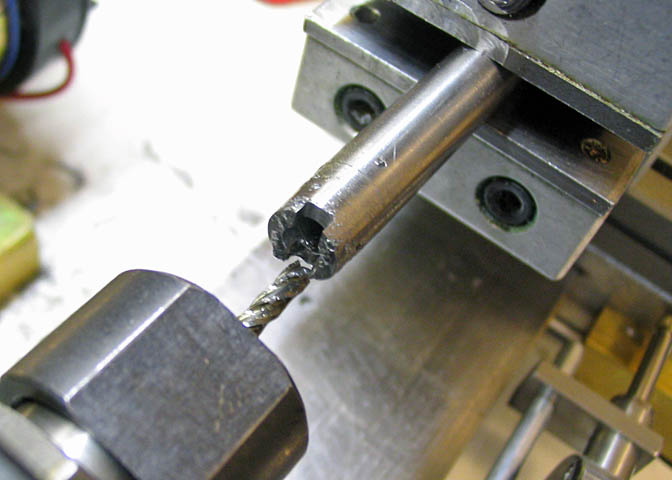
The tap will leave a little bur on the end of the shaft. Now is the time to get rid of it.
Just run a cutter tip into the start of the threads a few thou and knock off the burrs.
If you don't do this now, you will have a hard time getting it done after the next step...
Any additional finish turning you would like to do needs to be done before hardening.
I have some comments on hardening and tempering in other articles on this web site,
but I'll go over it quickly here.
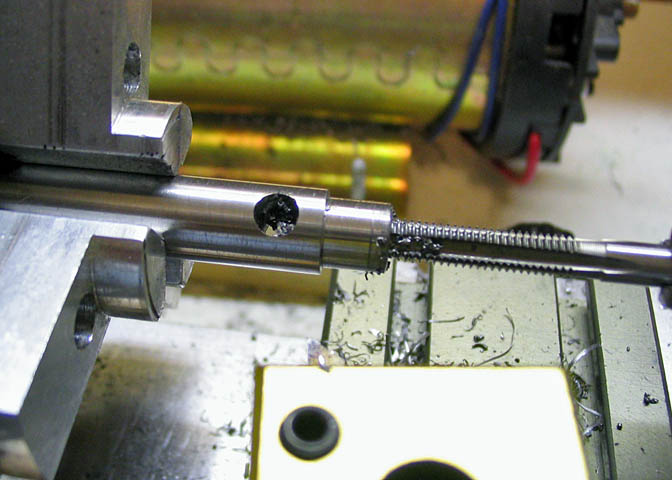
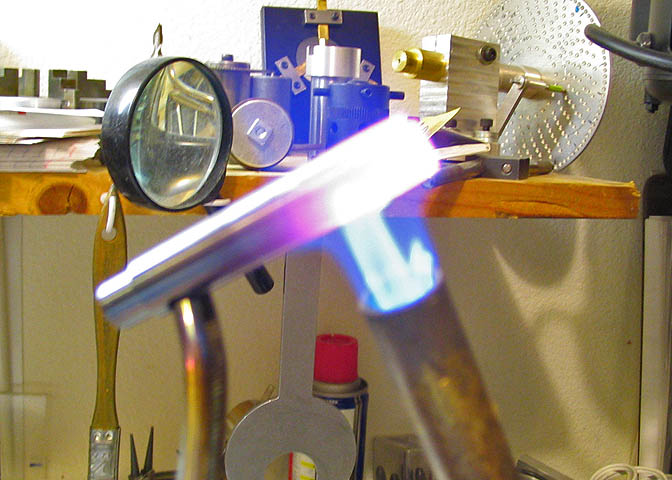
The shot above shows the business end of the shaft in the flame of a regular propane
torch. These torches make enough heat for the 3/8" rod used here, and maybe for 1/2
inch rod, but not much more if you want to do it in a reasonable time.
You only need to harden the nipple end of the shaft. Hold it with something that will not
be inclined to let it loose. I'm using a locking hemostat here. Put the end of the shaft
in the flame and rotate it slowly. Play the flame on the shaft below the cut out area and
let the heat creep up toward the slot. Keep at it until about 1/2" of the shaft is really bright
red. In the photo, it looks like it's white hot, but that's just what the camera is seeing. In the
real world it was a bright red.
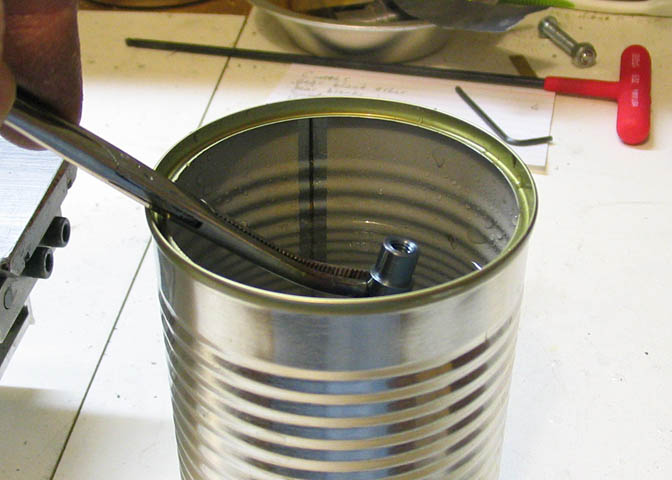
When you get that bright red, dunk the shaft straight down into room temp water. Swirl it
around as it hisses and cools. Watch out for yourself when doing this. Remember, the
shaft has a hole through it's length, and hot steam and water droplets are going to come
out of that hole.
When the piece is cooled enough to touch, chuck it up in the lathe and polish it with 600
or 1200 grit wet/dry sand paper. Make it shiny so you can easily see the color of the
shaft when you temper it.
To temper, go back to the torch and play the torch flame over the shaft about 3/4" from
the end you have just hardened. Use a lower flame this time and watch the color closely.
As the shaft changes temperature, it changes color. Watch the end of the shaft where the
cut out slot is, and as the color of the ears that form the slot turn to a light yellow, (usually
called "straw colored"), and just starting to get a very slight violet color dunk it in
the water again. You should have a good temper now.
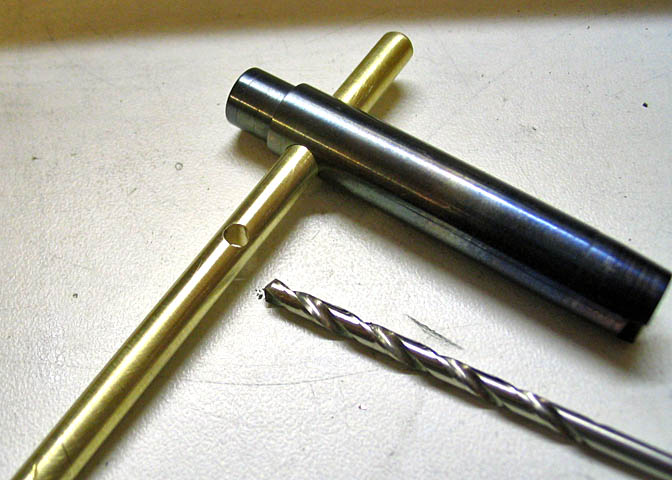
Okay. The shaft of the nipple wrench is finished. Time to make the cross bar. I used a
piece of hard brass round stock 3/16" in diameter, 3" long. I just used a file with the brass
in the lathe and put a radius on the ends and ran a piece of 600 wet/dry paper over it for a
finish. Then the cross bar is put in the cross hole in the wrench shaft, centered, and the same
drill bit used put the long length wise hole in the shaft is used to bore the center hole in the
cross bar. Clean up any chips on the bar and make sure it fits the wrench without any slop.
It mustn't be tight or it will gall. Just a nice close fit.
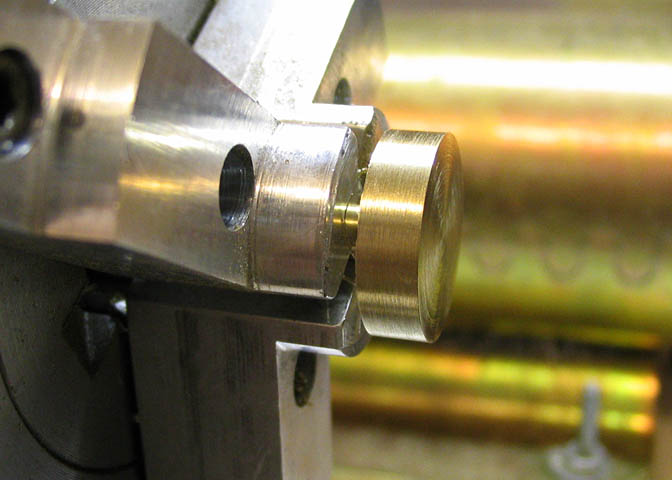
This is what will become the top button, or knob. The short, smaller diameter at the end
is sized to fit the hole in the brass cross bar. Again, it needs to be a nice fit, without
appreciable slop, but it cannot be tight. If you make it a tight fit. it will eventually get stuck.
Brass on brass will gall so bad it's almost like a weld. Make it a smooth, close fit.
This small piece needs to be long enough to go completely through the cross bar when
the button is threaded into the top of the wrench.
The next diameter larger in the above photo has to be made a size so it can be threaded
10-32 to mate with the tapped hole in the end of the wrench shaft.
No dimensions on these two diameters as they need to be fit to the individual wrench shaft.
Now, for the top of the button. This is another area where the factory wrenches I've used fall short.
The threaded button on the top of the wrench is small. Usually the same diameter as the
wrench shaft itself. The way things with these wrenches usually seem to go, you not only
need to rotate the wrench to get the nipple out, but initially, you have to press down on them
with considerable force to keep the flats of the wrench from rounding off the flats on the
nipples. That little top button can really dig into the palm of your hand.
I made mine from 3/4" brass stock and turned the button, or knob, end to .65". That gives
about twice the surface area for your palm to push on while loosening up those stubborn,
or otherwise stuck, nipples. Less pain. More gain.
Here, in the shot above, I'm just turning down the diameter and thinning down the button
thickness to about 3/16". Knowing I was going to put a nice gentle radius on the end of
the top button, 3/16" thick sounded about right.
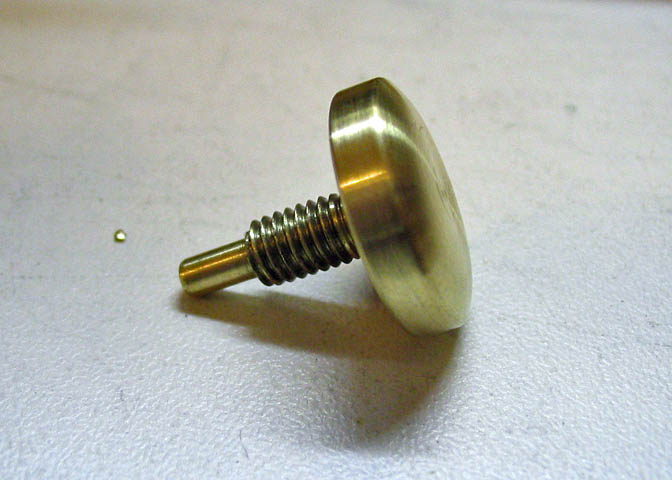
Here's the completed top button, threaded and polished. I just used a die to thread this.
If your die won't reach to thread all the way to the bottom of the button, you can just back
cut the shaft for the threads nearest the button to allow that part of the shaft to fully enter
the threads in the wrench shaft. You can see where I did that in the next photo, just at
the base of the button.
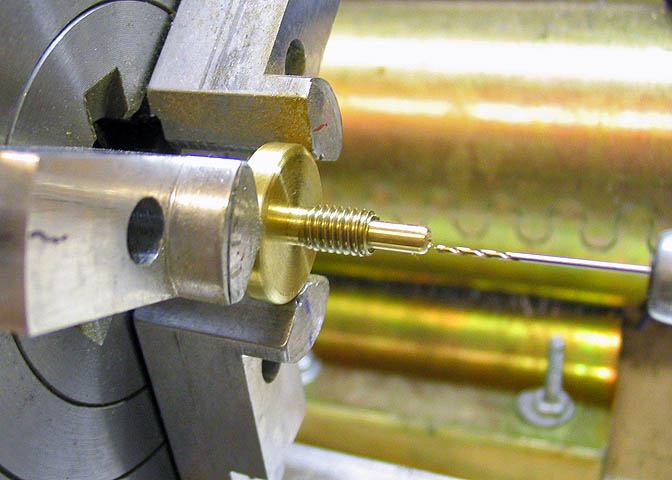
The small stub on the end of the button needs to be drilled for a nipple pick. I used a sewing
needle for my pick. Sewing needles are probably one of the best made little items you can
use for this. It seems that no matter where they are made, they are of good quality.
Measure the largest dimension of the eye of the needle you want to use, and pick a drill
about .001" under that size to bore your hole. Chuck up the button as shown, dial it in the
best you can, and center drill a small spot in the small end of the threaded part. Tiny drill
bits break very easily if chucked and forced into a piece like this. To keep your drill bit in
one piece, use a pin vise to hold the bit, let the vise rest in a drill chuck loosely, (so you
can spin it with your fingers), and feed it gently into the work piece. Clean the chip about
every .010" of feed, or the bit will plug and break. Slow and steady.
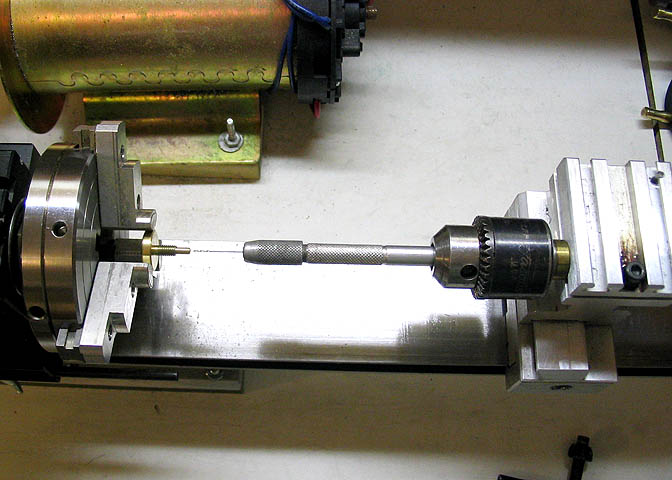
Here's the set-up I'm talking about. The bit is held in the pin vise, and the vise is just floating
in the drill chuck on the right. Not tightened at all, so you can spin the pin vise with your fingers.
Just use the drill chuck as a guide and a rest for the heel of the palm of your hand.
You only need to drill the hole about 1/4" deep. Then, put a dab of Locktite on the eye of the
needle, and with a pair of needle nosed pliers, push it into the hole.
Needles and needle nosed pliers.... Now we know.
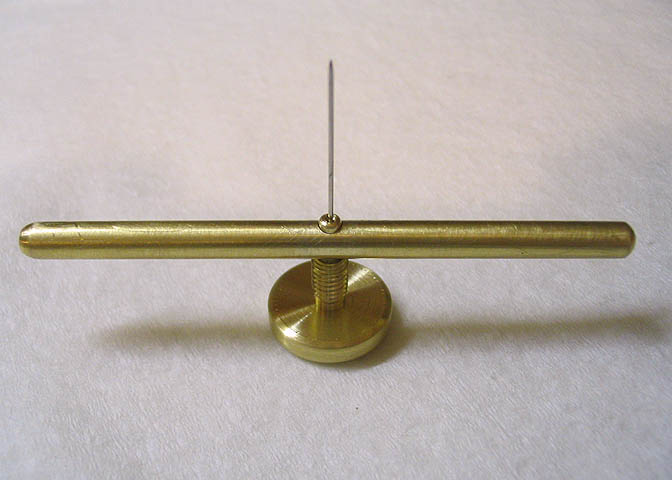
When things are put together, the button and cross bar will be situated like this.
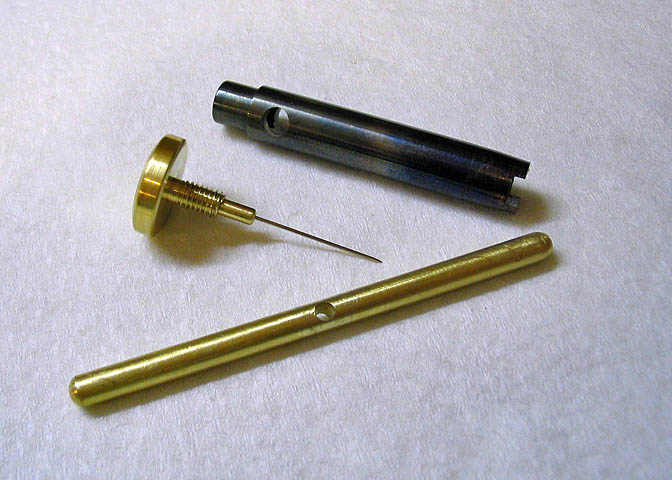
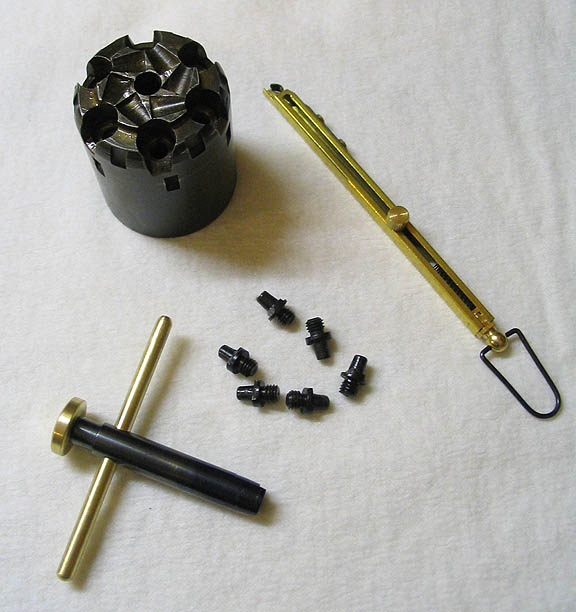
Here is everything ready to be assembled....
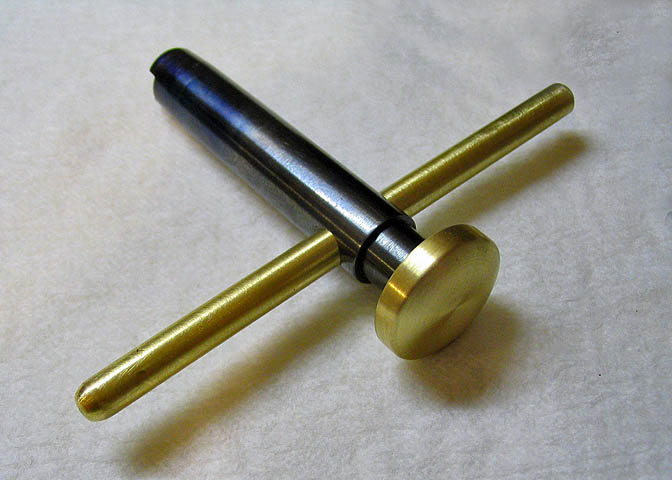
...and here it is all fitted up.
The first time I used it was on the nipple that the last commercial made wrench had
broken on (when I gave up on them). There were two nipples that were stuck tight as
could be in the cylinder of this revolver. I tried the first one... the nipple that had broken
the last commercial wrench. Wouldn't budge. I pressed down hard, turned the new
wrench, again hard. Snap! I thought, "Oh no. I've broken this one too" Nope. It was
just the threads of the nipple finally letting go. The final nipple came out the same way,
but I've got them all out, finally, and no broken wrench this time!
More Taig lathe projects
deansphotographica.com
(home page)
Copyright 2007, 2008, 2009, Dean Williams