Building a Powder Trickler
A Project for the Reloaders Bench
A powder trickler is something I would imagine that most people involved in the hobby
of home ammunition reloading would not like to do without. I've enjoyed the hobby for
many years myself, yet I've never owned one. I find myself wanting one almost every time
I sit down to load up some rifle ammo, but somehow I never remember to order one when
buying supplies from the component distributors. After decades of dribbling powder into a
scale using a powder dipper, I finally got around to making one for myself. Better late than never.
That's what they say...
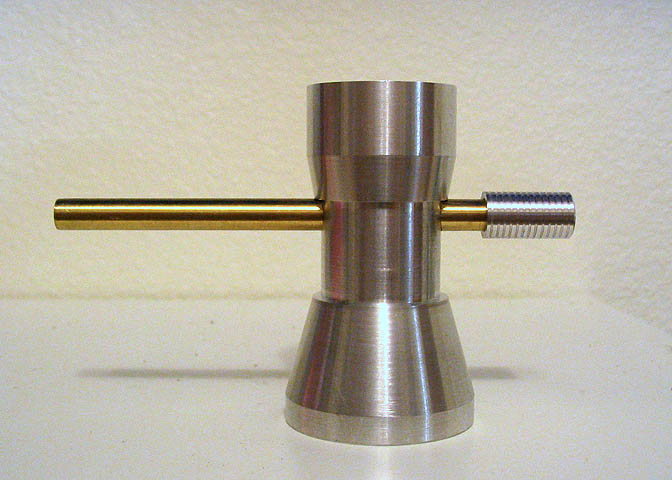
Here is a shot of the finished trickler. I'd never actually held one in my hand,
but I've seen lots of pictures of them on the web, and I patterned this one
after what just about every manufacturer seems make. They all look the same,
more or less. They are all supposed to do the same thing, so that makes sense.
This is a pretty easy project, as it's all basic turning. Three or four leisurely hours
and you can have a custom made accessory for the reloading bench..
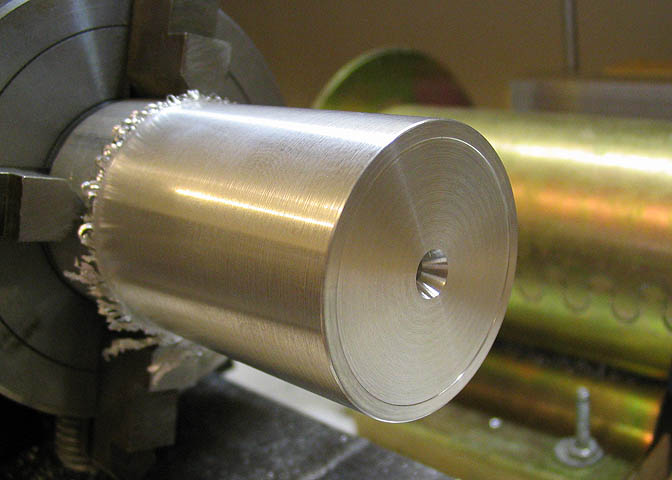
I started with 1.5" diameter aluminum, about 2.75" in length. Face off one end
and take a skim cut to remove the oxidation layer. This end will be the bottom of
the trickler, so a recess is cut leaving a landing on the outer circumference of
the base so it will not wobble if it is set on a slightly uneven surface. The landing
is about .010" thick and .090" wide. It's not a critical dimension.
A center drill is used to spot the base in order to use a tail stock center.
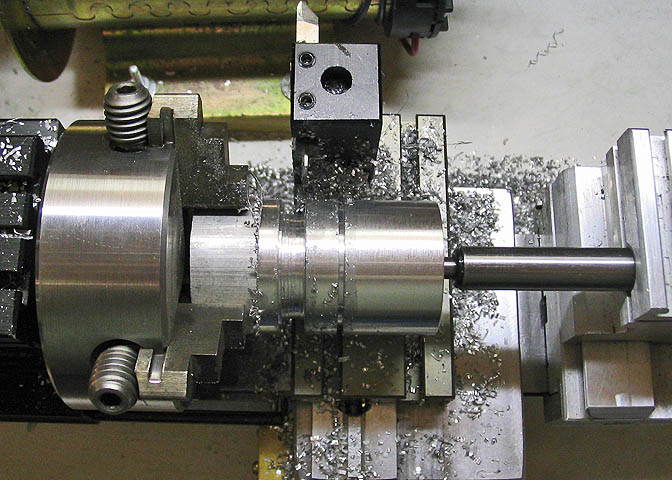
I used a short parting tool to whittle away the section for the waist. On this one
I started at .975" from the base and ended the waist cut at 1.725" from the base.
The waist is purely cosmetic and can be made to any dimensions as long as it
is left with enough material to hold the powder tube without wobbling in it's bore.
I made the final diameter of the waist section .925" diameter.
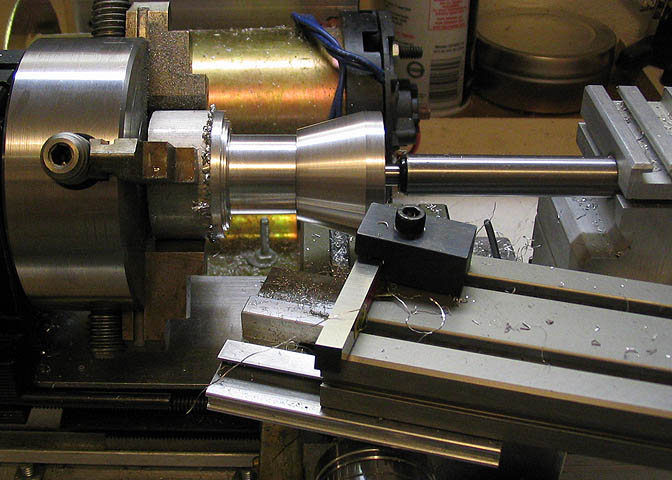
Next a taper is turned from the base to the beginning of the waist section. This
is about 20 degrees, and I stopped the taper at a flat of about .1" before it meets
the waist. No reason for this except it looked right to me.
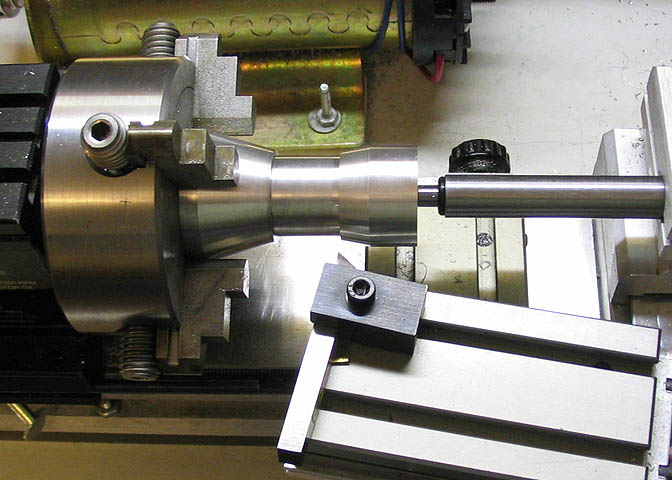
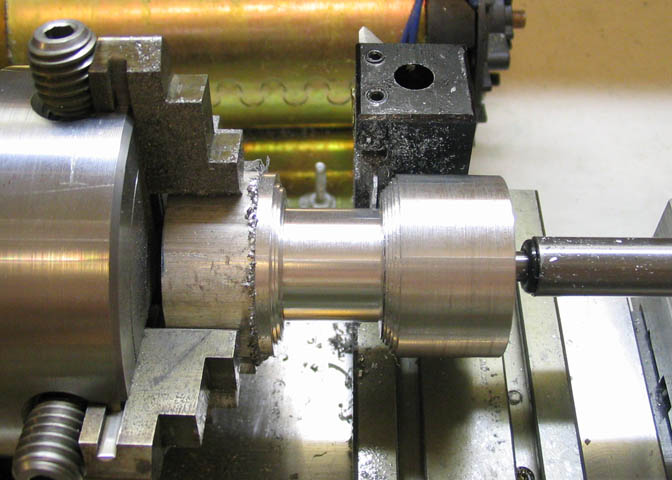
When the base end is done, the piece is turned end for end and faced off and
center drilled for the tail stock center. Again, a taper is turned. This time it's
about 25 degrees, and the "body work" is done.
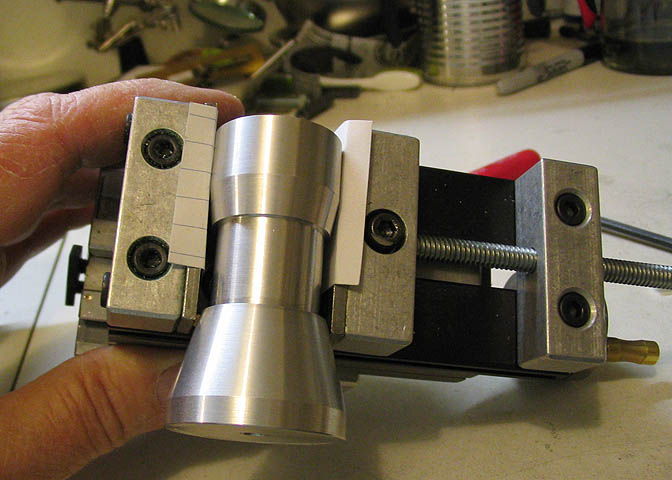
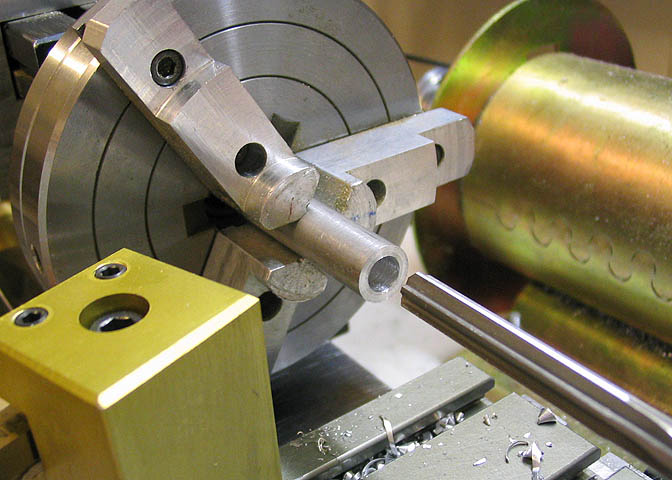
The piece is clamped in the mill vise using paper card to protect it from the jaws.
The base end of the taper doesn't bottom out in the vise, and I was afraid it
might slip during the next machining step.
To keep the piece from moving, since only the top part is held by the vise jaws, I
filed a shim to a thickness needed to keep the waist section perpendicular to the
lathe head stock. The shim piece is glued to the vise with a tiny drop of super
glue to keep it from falling out while going through the next steps.
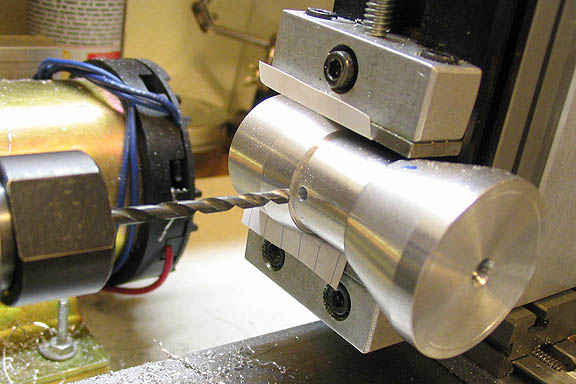
First, center drill a spot on the centerline of the trickler body. Then drill through
with a small bit. About 1/8" will do.
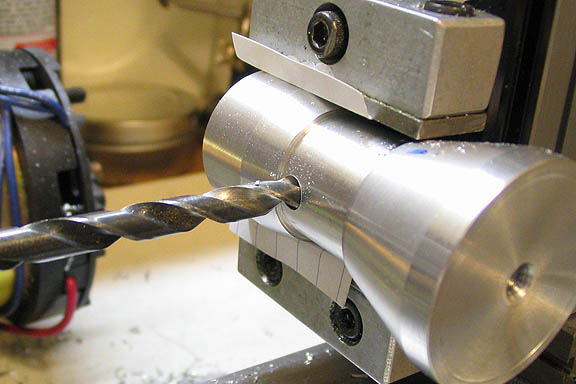
Next drill with a bit a few thousandths smaller than the reamer that will be used for the
powder tube bore.
The material I used for the powder tube is .25" O.D. hard brass hobby tubing. The
wall thickness is .012".
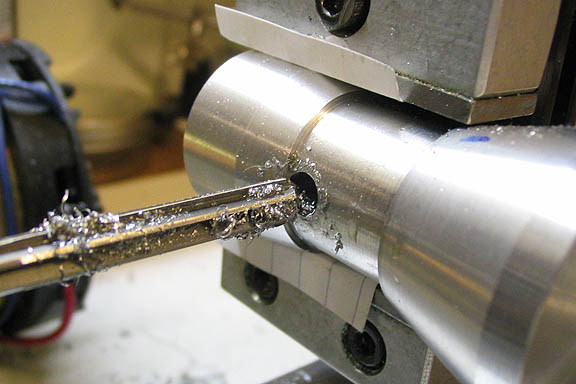
The final step for this setup is to ream the hole for the diameter of the powder tube.
The tube, being .25", and the reamed hole, being .250", means that the tube as
purchased will not fit the hole. Easy to fix. Just put the tube in the three jaw and
polish it down until it is a nice close fit. It must be polished or it will gall in the bore
and ruin your work. A few swipes with 600 grit wet/dry paper, and a finish with
1200 wet/dry will do a good job of it.
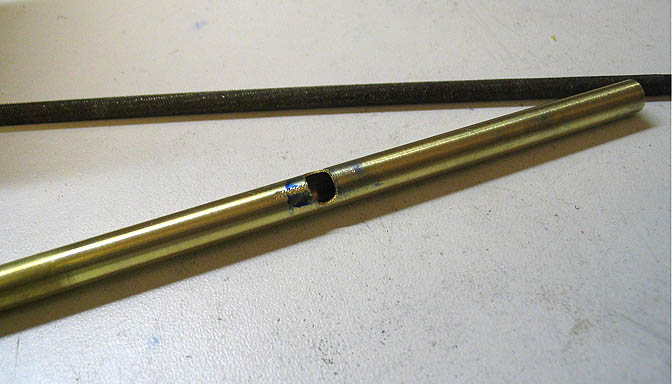
Here's the tube. It's been polished, and I've just cut the powder opening in it using
a chain saw file. You can just file right through the tube wall until you get a hole that
enters about 1/3 of the diameter of the tube. Clean off any flash that the filing creates
and polish the rough edge of the hole and it's ready. Cut to 3.8" with the hole at 1.25"
from one end of the tube.
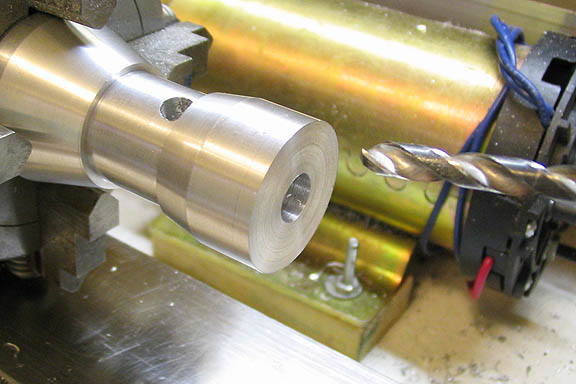
Now it's back to the lathe chuck to finish up the opening for the powder well in the
top of the trickler body. Drill through to the powder tube bore with a small drill, then
open up the hole to 15/64". Take care not to go clear through the powder tube bore
or the bit will scar the bottom of the bore. Then open up the powder well with a
boring bar.
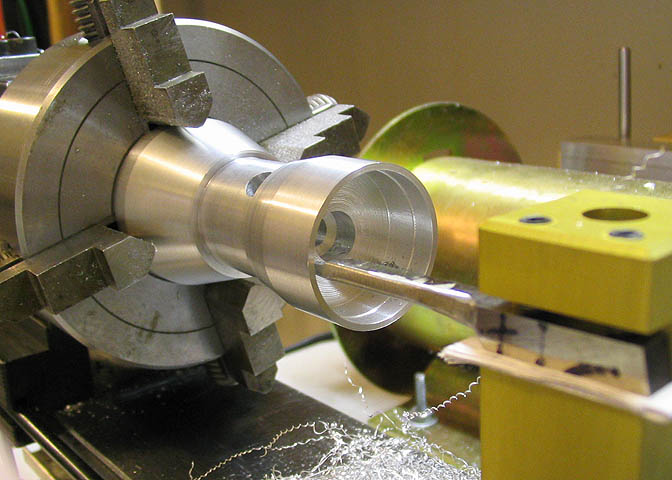
Here, the well has been bored out, with only a few light cuts needed to finish it up. Be careful
not to bore too deep, or you'll cut off the top of the powder well when the boring bar meets
the taper on the outside of the trickler body.
Something is needed on one end of the powder tube to keep powder from coming out
both ends. A small knob serves that purpose while giving you something to hold on to.
Here, a piece of 3/8" aluminum rod has been drilled and reamed .25" dia., .4" deep.
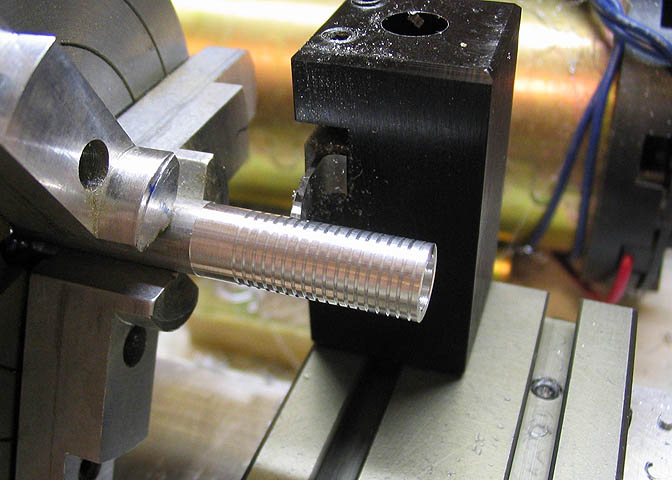
I used a pointed turning tool to make grooves in the knob. The grooves are .015"
deep and .050" center to center. The knob is parted off for a length of .7".
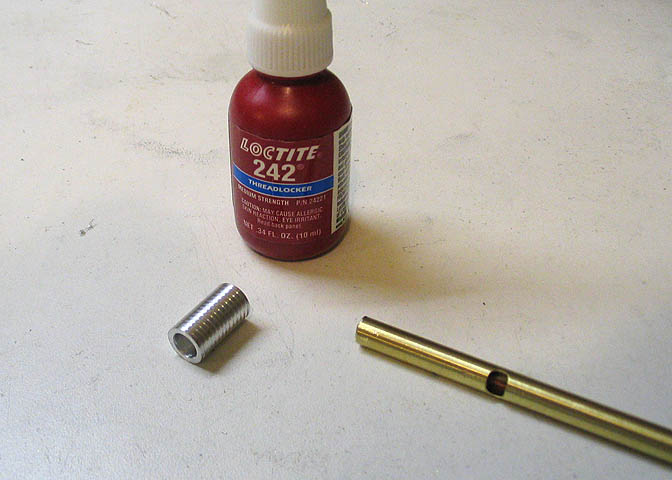
A drop of Locktite holds the knob to the end of the powder tube. It goes on the end
closest to the hole in the tube.
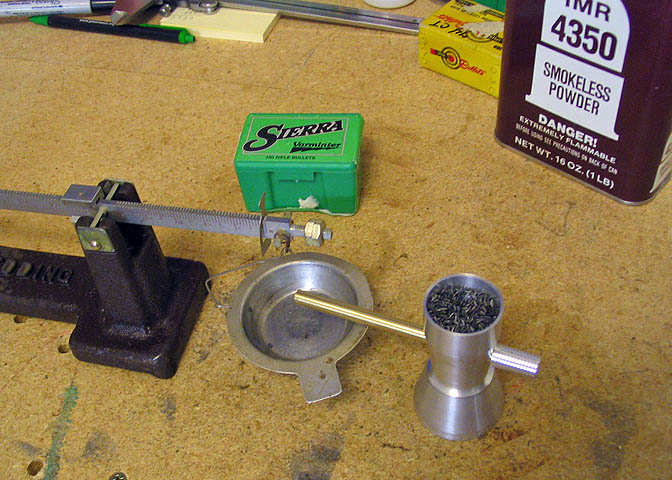
Here it is, ready to do what it does. I made it so that by pushing the knob on the end
of the tube all the way towards the trickler body, it will cut off the flow of powder from
the well. Pulling the knob out about a quarter inch lets powder feed into the tube as
it is rotated. It feeds all powders from tiny flake and ball types to large flake and
cylindrical rifle powders.
More Taig lathe projects
deansphotographica.com
(home page)
Copyright 2008, 2009, Dean Williams