A Flex Wrench
(for slippery round things...)
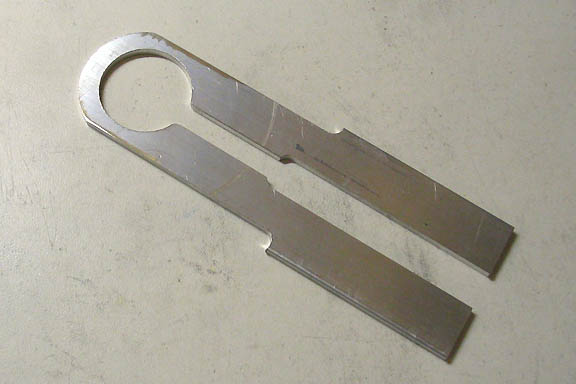
Flex wrenches are handy for round threaded pieces that otherwise have no surface
to grip for tightening or removal. I use these mainly for camera work. Older cameras
often have knobs and dials that have no obvious way of removing them. They have
been threaded onto the camera at the factory by means of a friction driver, and are
a stinker to remove without a tool that will grip a smooth round surface.
The flex wrench works much like a pipe wrench, but it has no jaws to mar a surface.
Instead, it relies on the entire surface of the wrench being in contact with the part
you want to remove. This is one I made up for a job recently. As often happens, I
needed the tool right away, so made it with a minimum of shine and polish work. I've
made a few of these over the last few years. This is the first one I've made on the
Taig mill. I used to make them on the Taig lathe.
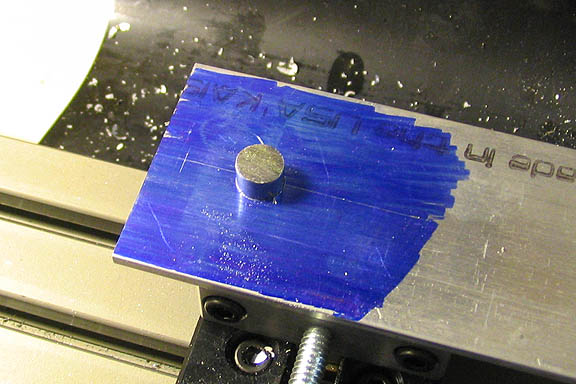
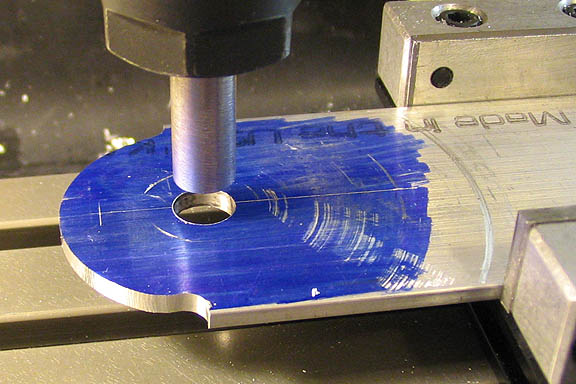
Starting with a piece of 1/8" x 2" aluminum, a 3/8" hole is drilled in one end. The hole
is drilled centered in the stock and 1/4" plus half the diameter of the size needed for the
wrench. Then, if you don't have a rotary table, you can mill the radius on the end of the
wrench by using a 3/8" piece of round stock as a pivot.
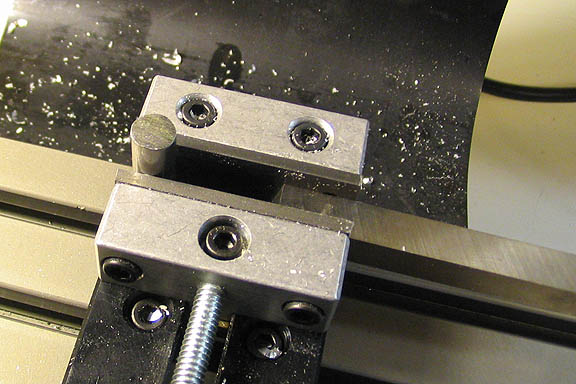
The round stock used as a pivot is positioned in the mill vice as shown above.
Then, the piece of aluminum stock is rotated on the piece of round stock to cut the
radius. When using this method, you have to be very sure to up mill only. Always move
the work piece into the cutting edge of the rotating mill. If you down mill, the piece can be
pulled into the mill and make a mess. This method works for steel work pieces too, but
you must take light cuts. A sharp end mill is mandatory. Keep a firm grip on the piece as
it is rotated. Go slow.
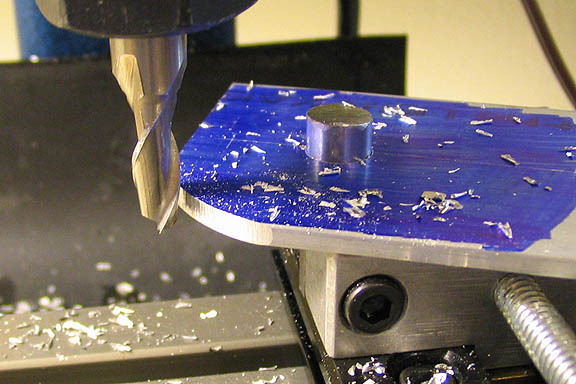
Once the radius is milled on the end of the work piece, center can be located using the same
piece of round stock that was used as a pivot. Mount the round stock in the spindle and
center it in the drilled hole in the work piece.
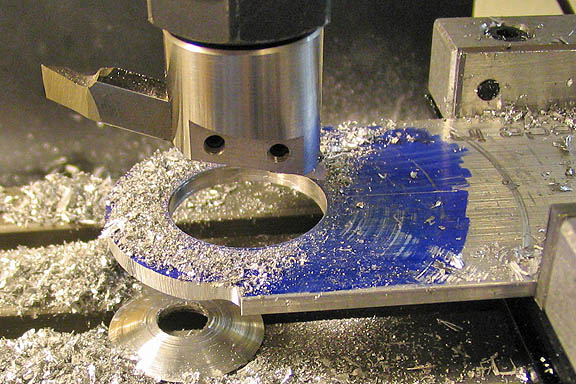
Now a larger hole is cut. In this shot, a fly cutter is being used with a HSS bit. It's a big
cut since the tool tip cuts away a lot of material before the "hole" falls out, so the slowest
spindle speed was used. Then the bit is repositioned in the fly cutter a few times until
the proper sized finished hole is cut.
A boring head would be a more proper tool for this job, but I haven't made one yet. That's
another project. The fly cutter will do fine, though adjusting the bit for an exact
size hole takes more time.
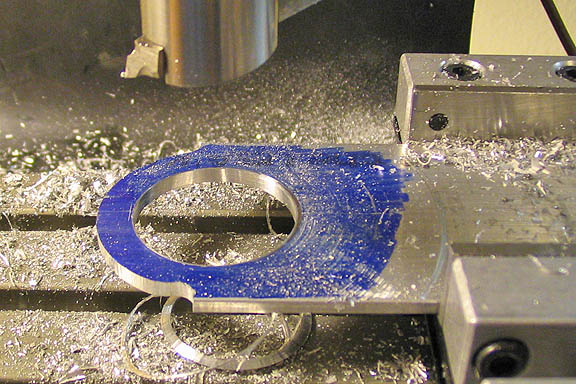
Here's the hole finished to the proper size needed for this wrench. The rest of the job is
simple straight milling so I won't show it here.
The slot in the finished wrench needs to be wider toward the ends of the handle, as can
be seen in this shot. If the wrench to be made is very small, like 1/2", the slot leading up
to the hole can be quite narrow, like 1/8". The narrower slot in the wrench here is 3/8" and
the wider section is .575". The overall length of this wrench is six inches. If you were
making a wrench for a 1/2" diameter object, the OAL should be around three inches to keep
from putting too much pressure on what you're trying to loosen, (like thin wall tubing, for
instance).
These wrenches have a pretty narrow range for the given hole size. The one in this
particular wrench happens to be 1.225", and it will fit on round shafts, dials, etc., that
are from about 1.220" to 1.230", and maybe a little more or less. Not much though. If
you try to use it on something too small or large, it won't grip well. If you need to loosen a
lot of different sized round things, you will need to make a number of wrenches.
More Taig lathe projects
deansphotographica.com
(home page)
Copyright Dean Williams