Small parts, & such.
Making little things...
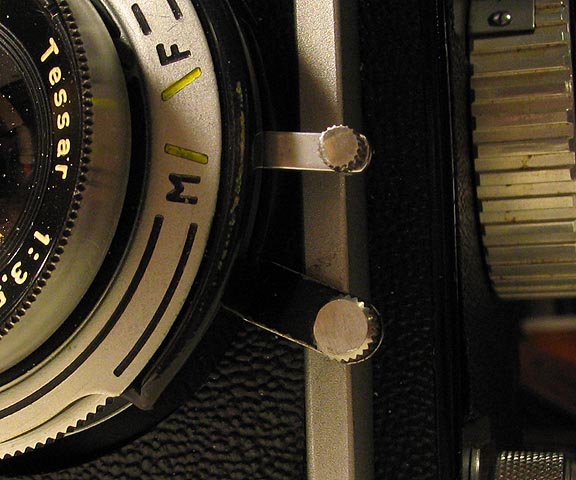
The photo above shows the side of a camera shutter. The two levers are controls for
the shutter, but when the camera came to me the little knurled knob on the top lever
had gone missing. The owner had asked me to try to find a replacement. I didn't
have one anything like it, so, to the lathe I go.
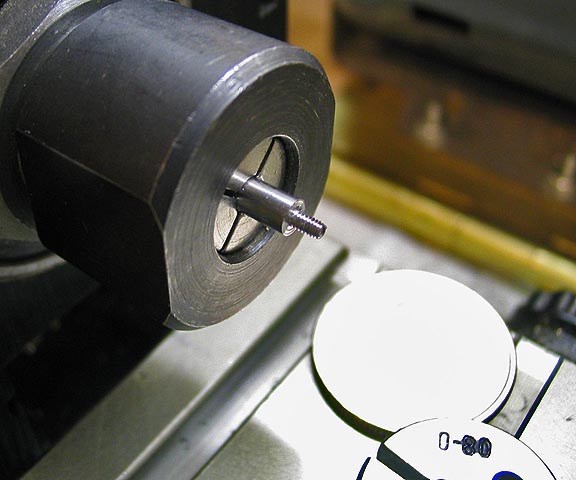
First thing was to find an appropriate piece of stock. A piece of 1/8" drill rod was about
right. Here, I have turned down a section at the end of the rod and threaded it with a 0-80
die. Originally, the knob had been riveted into the shutter lever. I can make a new knob to
rivet in to the lever easy enough, but the riveting requires complete disassembly of the
shutter, which also means disassembly of the front of the camera, too. I can do that, but
by the time I got done with it, the little knob would end up being a hundred dollar job.
Instead, I'll just thread the end of the knob, and make a small jam disc for the back of the lever.
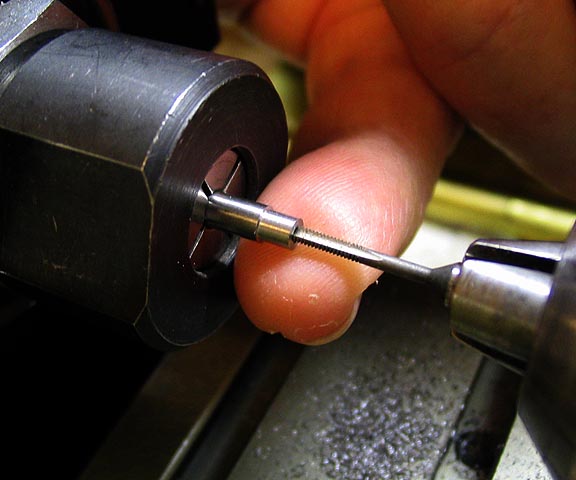
Now the piece is reversed in the collet, and drilled and tapped for 0-80 threads.
Tiny taps need a gentle touch. I advance the tap only about 1/3 of a turn before backing
off and breaking the chip in the hole. If you let any chips build up, the tap will break. Small
taps are very brittle. After each complete revolution of the workplace, the tap is backed
out and the hole cleaned out with a puff of air.
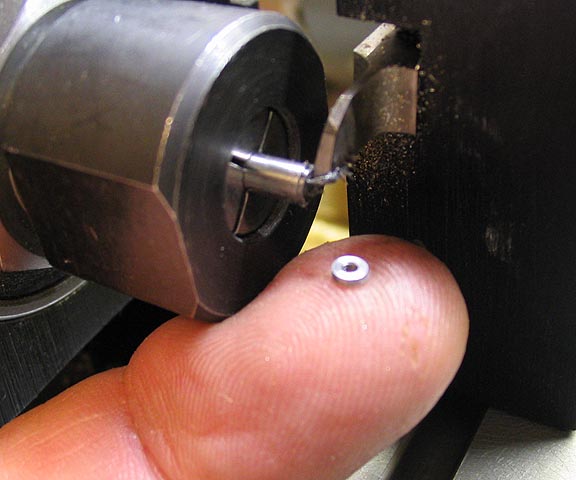
Once the hole is tapped in far enough, a thin jam disc is parted off. This one is
only .025" thick. Just enough to provide enough threads to lock the knob to the lever.

The disc is threaded onto the part will become the knob to make sure the threads are
clean before the next step.
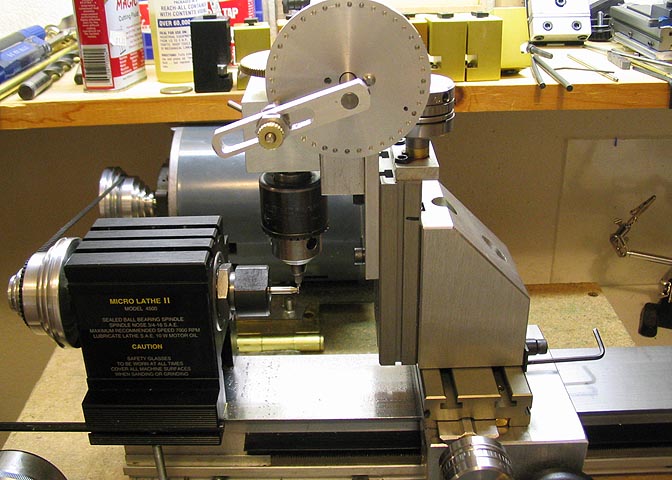
Now the knob end is mounted in my divider, (you will find an article on how I built this divider
in the projects link at the bottom of this page). The threaded end is placed into the chuck
and the end that will be the knob faces down. Then the "knurls" are cut into the knob using
a small diamond burr. You can buy these burs at many hobby or craft stores. Also places
that sell Dremel tools will have them. They usually come in a set of 10 or more for a few dollars.
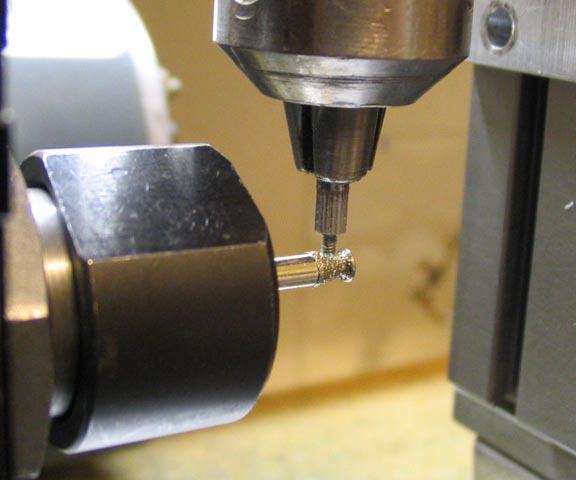
Here is a close up of the diamond burr and the chuck holding the work piece. This
particular burr cuts a small "V" shape. I chose a division that would give me 20 cuts
for this after doing a test cut on a scrap piece and seeing that it made a knurl that
looked similar to the factory item.
The burr is run at the highest speed on the lathe, and the piece is fed into it slowly.
Then the piece is backed out, the next division is set on the divider, and the
process repeated until I came back around to the beginning cut.
Then the piece is cut off to the proper length in the lathe.
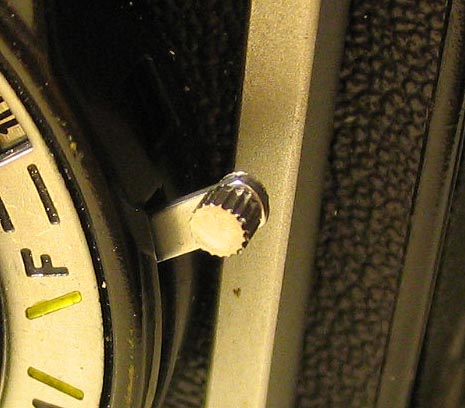
Another shot of the finished item in place.
More Taig lathe projects
deansphotographica.com
(home page)
Copyright 8-08 Dean Williams