Gear Cutting on the Taig Lathe
I need to cut gears for some of the camera repair jobs I get, and have been working
with the Taig lathe to get it set up for this task.
I have an indexer I made when I used to have some Sherline equipment and have been
trying to figure a way to use it on the Taig lathe, but it needed a little modification. I used
to use it on a mill, and it was fine for that purpose, but on the lathe with a milling
attachment it was a bit too big.
I milled away parts of my indexer to make it a little more compact. This let me draw
the slides in a bit on the cross and vertical slides to allow more of their gibs to bear
on the dove tails, which will cut down on potential vibrations.
The blank for the gear I need to cut is a little more than just a round disc.
The blank is finished up and parted off.
So here's the blank, and the part I need to end up with when I'm finished.
The plastic gear has a couple of stripped teeth.
Cutting gears requires a cutter, of course. You can buy them from some tooling houses. They are
quite expensive. There are eight cutters for each gear pitch, and they run in the neighborhood
of $35-$50 each. I just make single point cutters for the particular gear profile that I need.
John Stevenson has a good page of info for making your own cutters.
John Shadle also has an excellent page regarding this subject.
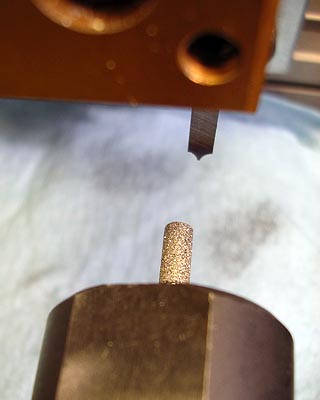
The way I'm making my cutter in the shots above is probably not as sophisticated as other methods,
but it will work well as long as the diamond burr in shown in the headstock collet is of the proper diameter.
Sometimes you have to make a cutter, to make a cutter, if you get my drift.
You may have to make a cutter out of drill rod, which will then be used to cut
the gear profile cutter, (so you can cut your gear). Getting set up is often the
bigger part of the job..
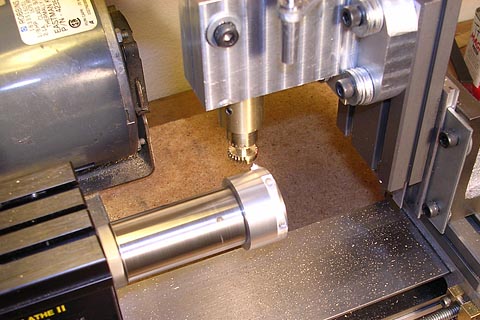
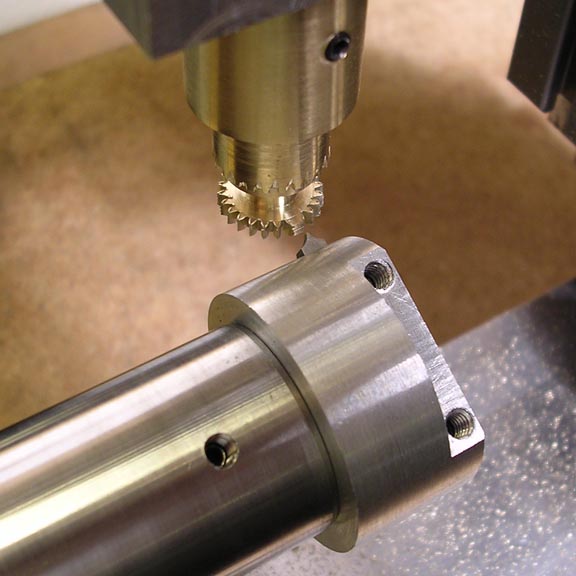
So, with the gear blank cut, and the profile cutter ready to go, the cutter is mounted in its' fly cutter,
and that is mounted into a Taig ready made arbor. Each tooth of this gear takes four passes of
the vertical slide, and each pass gets progressively less in-feed on the lathe cross slide. This is
because with each pass, more material is being removed at one time. The first pass can be around
.020", since it is only cutting the root of the gear tooth. The next passes take more and more of the
gear tooth profile, so are fed in less. On this particular gear I fed .020", then .015", .005", and finally,
the last .004", to make each pass with the vertical slide. Other gear sizes and pitches will likely need
different feed rates and increments than I've mentioned here.
I did run a test gear blank taking different cuts, and found that the Taig will take the full
cut in one pass without any undue vibration or noticeable gib problems, but what a racket! The feed
rate of the vertical slide must be very slow to do so, and there's no sense putting the tiny cutter through
so much stress, either. Taking multiple cuts is actually the faster way of getting this done.
This gear is of brass, by the way. I'd expect similar cuts for aluminum, and much smaller cuts for steel gears.
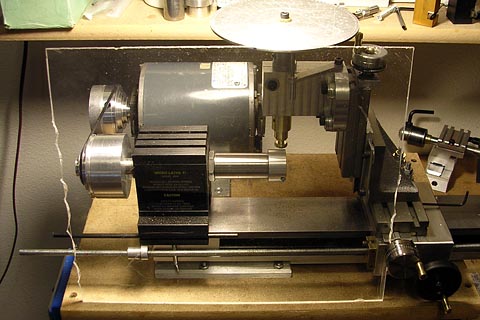
Also note the plexiglass shield. The cutter is cutting on the back side of the arbor, (as it swings up through its arc),
and so flings chips toward the operator. No need to mention safety glasses here, right? Wear 'em.
Now, with the set up ready to go, the cutter centered on the blank, the apron and cross slide gibs locked
down, I started cutting. I ran the spindle as fast as it would go, since it's an interrupted cut. After each cut,
the lathe motor is turned off, the vertical slide is backed out, and the indexer is turned to the next hole
on the index plate. Then advance the cross slide the required increments and lock the gib again.
Motor back on, and feed the vertical slide into the cut again, and so on.
After advancing through all the holes on the index plate, and running the cutter through each
cycle of feeds, I finally come to the cut I was looking for... The last one! One more cut, and I
have my gear.
After removing the gear, a fine file is run over the flat surfaces, since each cut leaves a tiny
chip attached to the teeth.
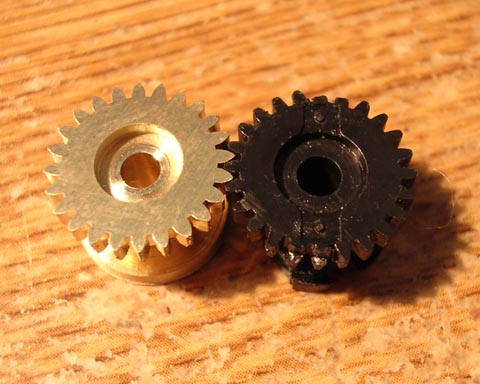
The old plastic gear, and the new brass unit.
I still have to finish the wind cogs and ratchet bevels on the bottom...

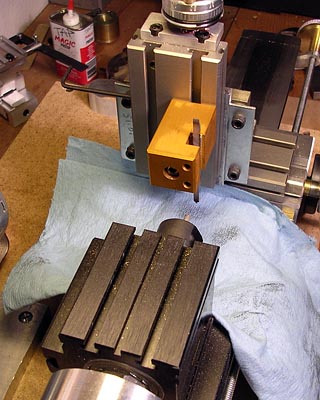
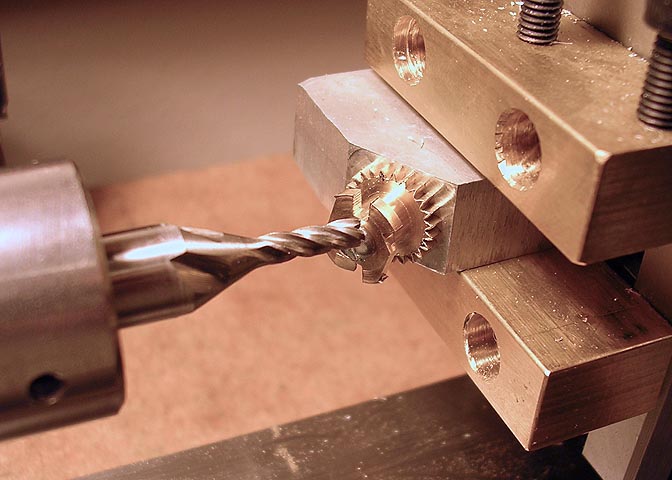
There are a number of cutouts and angles on the back side of the gear shaft. I made a simple setup
to hold the gear for milling. If I want to make more of these, I'm gonna make some jigs.
This is the first cut of many.
There are two angled bevel cuts on the bottom to allow the gear to turn backwards after cocking the camera,
returning the cocking lever to it's rest position. So I had to make a jig for this. In this shot, all other cuts have
been made except for the two angled cuts.
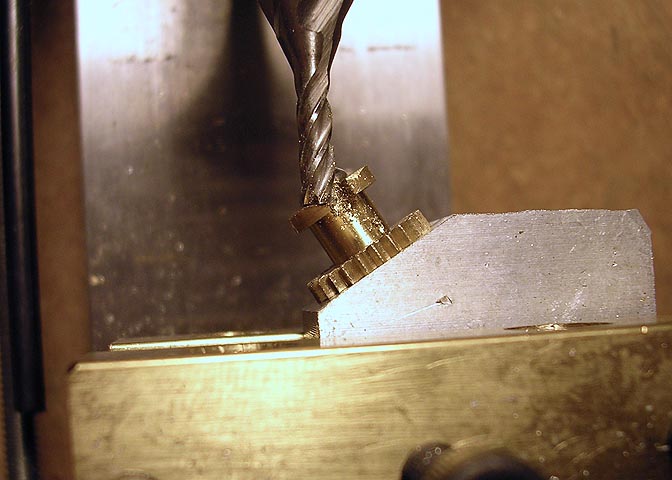
Cutting the bevel, and after deburring, that's it.
I used a Taig blank collet as a fixture, drilled and tapped so I could
chuck up the gear and take a whisker cut across the flat surfaces
to clean up the chips that were left attached to the gear.
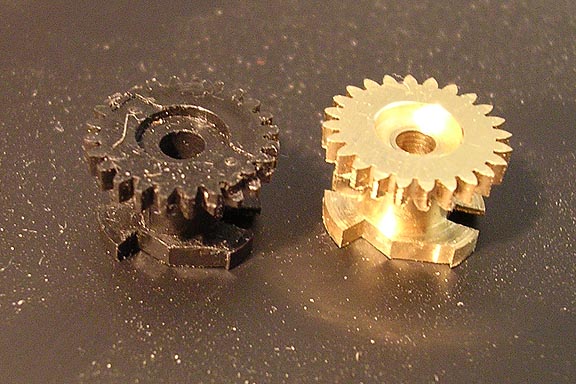
Here is the new gear, and the old.
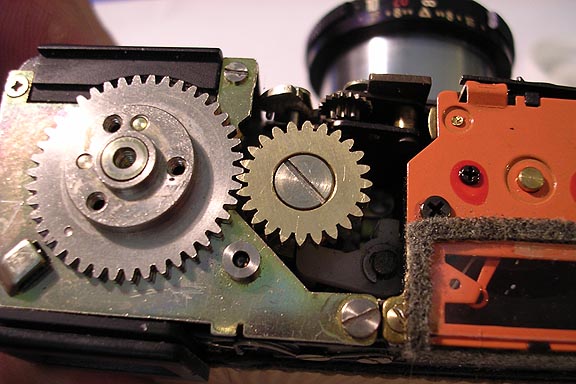
And this is where it goes.
More (Taig) lathe projects
deansphotographica.com
(home page)
copyright Dean Williams
6/07