Building a Follow Rest for the Taig Lathe
This is a pretty easy project that can come in handy now and then when turning
longer pieces in the lathe. Unlike a steady rest, that attaches to the lathe bed and
remains there as turning operations are carried out, a follow rest attaches to the
lathe carriage and moves along with the cutting tool, preventing work piece deflection
when cutting long, and usually thin diameters.
This project was done mainly on the mill, but can also be done easily on a lathe
with a milling attachment.
Materials needed are minimal. A piece of 1/2" thick aluminum plate about 2 1/2"
square, a piece of 1/4" square brass stock about 3" long, an inch or so of 1/4" x 1"
aluminum flat bar, two 10-32 x 1/2" SHCS, two 10-32 x 3/4" SHCS, two 10-32
square nuts to fit the Taig lathe cross slide T-slots.
The first step is to square all the sides to each other and make sure there are no burs
on the edges.
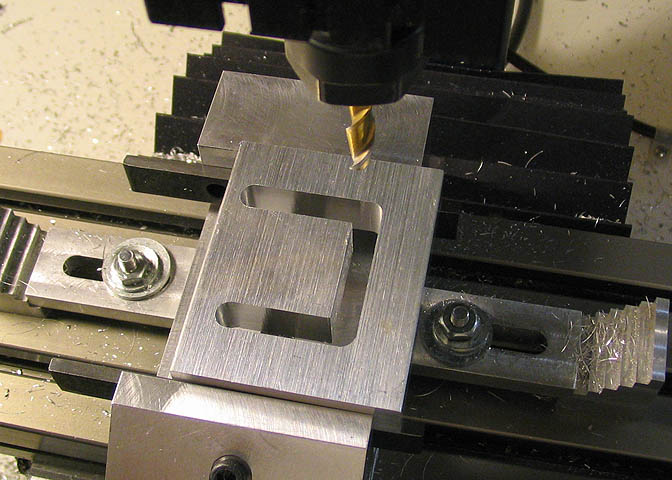
The body of the follower is then milled out to start the cut away part of the rest. It's
milled to leave a 1/2" section on what will be the top, rear side (on the right) and bottom.
The side on the left will soon be milled away to leave a sort of "C" section that will be
the main body, but not until all other work on the piece is done.
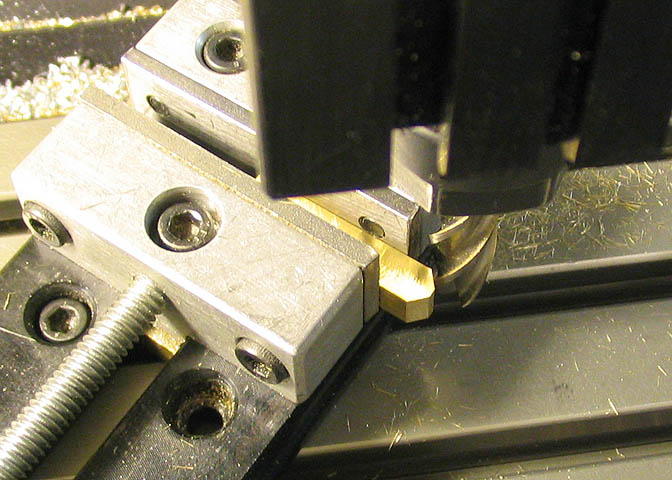
The next step is to mill out the recess slots that will hold the follower "fingers". The slot
in the top of the piece, (which is oriented at the bottom of the picture in this shot), is
milled 1.375" on center from the back of the body. The slot in the back of the body (shown
near the end mill in this shot) is located by putting a sharp dead center in the lathe spindle, and
setting the follower body on the cross slide of the lathe. Then by moving it across the cross
slide, mark the location with the point of the dead center. That will be the center of the milled
slot that is being cut here. The slots are milled .210" deep using a 1/4" end mill. After the slot
has been cut full depth, set the table travel over one way or the other to take an extra
.001" off one side of the slot so the fingers will fit easily.
Once this is done, do any finish work you would like to the outside surfaces, whether
end milling all over, fly cutting, or just leave the stock finish. What ever looks good to you.
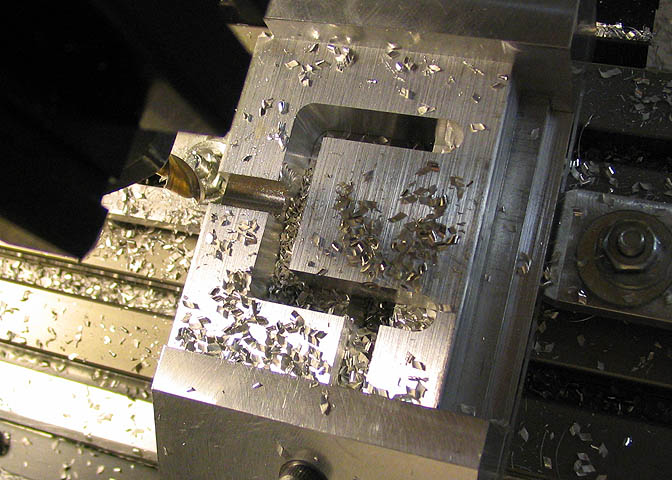
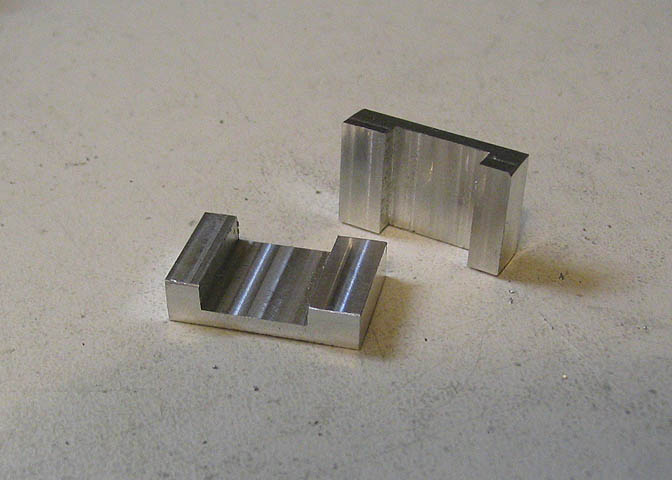
Once all other milling work is done the waste material on the front of the follower can
be milled away...
Like this. Mill it down until the width of the follower body is 1.65".
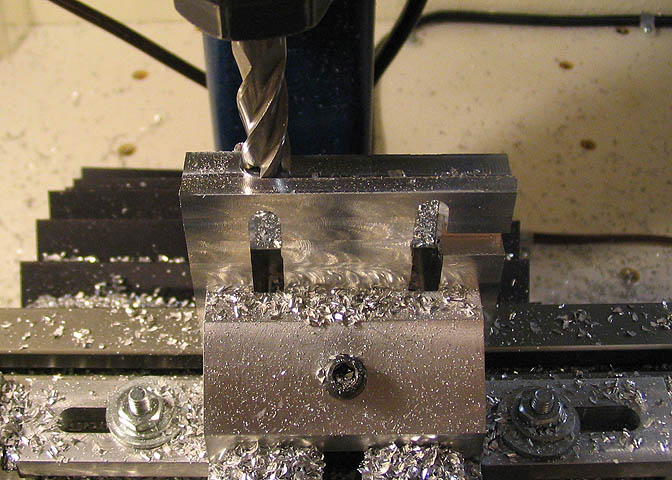
The next step is to make the fingers. If you have some 1/4" square brass stock, this is a
quick job. If not, mill some brass down to 1/4" square. The fingers are 1 1/4" long.
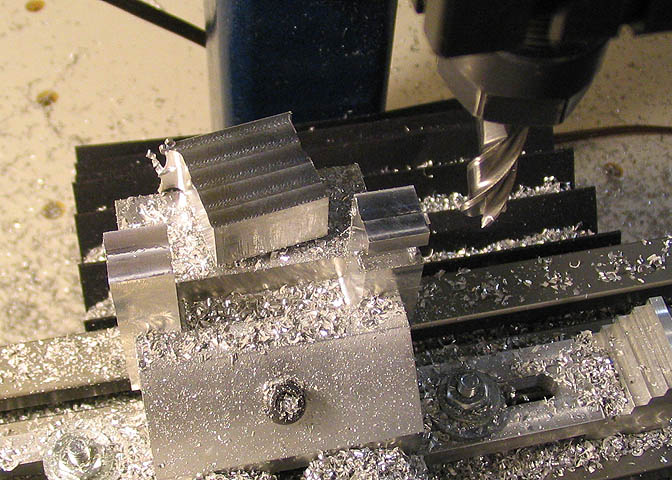
Finally, mill a 45 degree angle on two opposite sides of the end as shown in the picture.
To get the angles the same length, so that the small flat is in the center, just make sure
that the finger sticks out of the jaw a known amount. For instance, I used a piece of scrap
as a gauge, held against the opposite end of the vise jaws so that once one angle was cut, the
finger was just flipped over, pushed against the scrap gauge, and tightened in the vise for the
second angle cut. Leave a flat of about 1/16" on the end of the finger.
These two little widgets are the clamps for the fingers. They are .75" long, and .485" wide.
Total thickness at the thickest leg is .20". The narrower leg is .15" wide, the thicker one
is .20" wide. The thicker leg is .035 shorter than the other leg, so the clamp will sit flat on
the fingers. The wide slot down the middle is .43" wide.
Now, all those numbers are not critical. Any kind of clamp will work as long as it provides
enough pressure on the finger to keep it from moving. I only made these to the dimensions
given because they looked right to me.
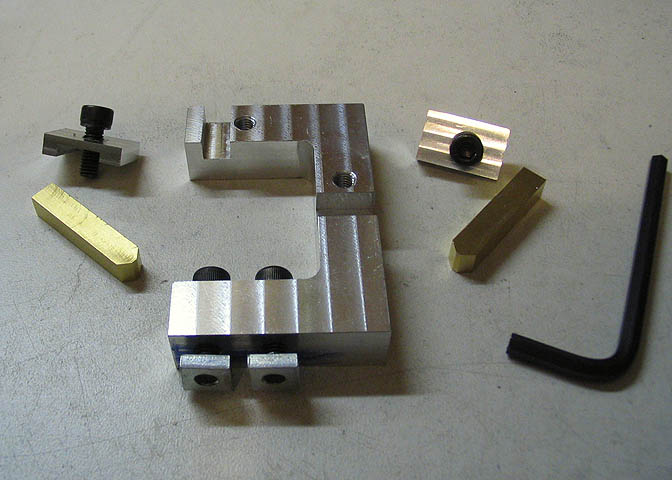
The last thing to do is drill and tap the needed holes. The locations are not critical, and it's
easy enough to see where something needs to be fastened from the picture.
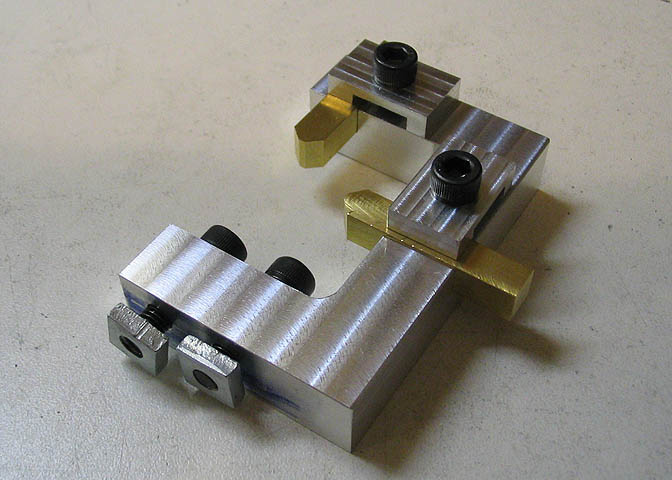
Here it is fully assembled.
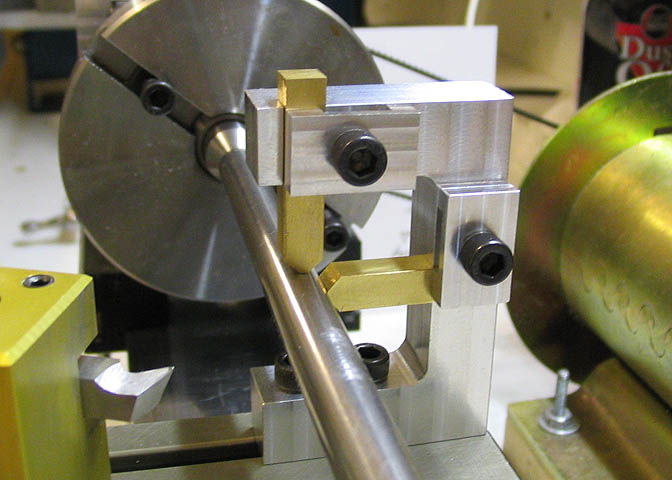
And a shot of the follow rest in place on the lathe.
More Taig Lathe & Mill Projects
deansphotographica.com
(home page)
Copyright Dean Williams